The Case Study
Issue 4
Nonlinear Resonance NDT: Using complementary techniques to detect a wider range of flaws
We assess how this game-changing NDT solution can integrate into established non-destructive testing workflows to offer enhanced flaw detection capabilities for AM manufacturers.
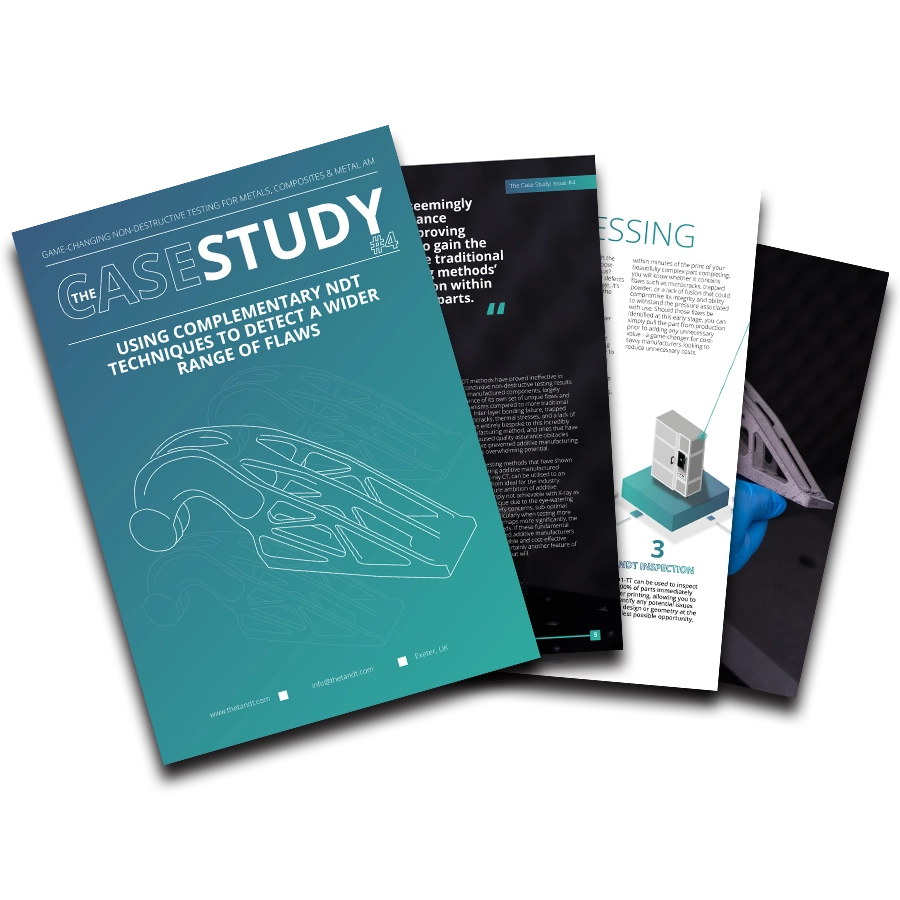
Nonlinear resonance NDT: Using complementary techniques to detect a wider range of flaws in metal AM parts
Why NDT is a must for manufacturers of safety-critical components
Introduction
No matter what product you are producing, the execution of an effective quality assurance process is the key to building and maintaining a positive reputation amongst your customers. Consistently get this process wrong and your customers will almost certainly become someone else’s customers. Allowing defective components, or ones far from optimal quality to leave your manufacturing facility can prove detrimental to your reputation, but if you are embracing 3D printing as your preferred manufacturing method, testing has proven to be a costly and complicated process. Theta Technologies is changing that with a revolutionary non-destructive testing solution designed to offer just that, a solution, for frustrated additive manufacturers across the globe.
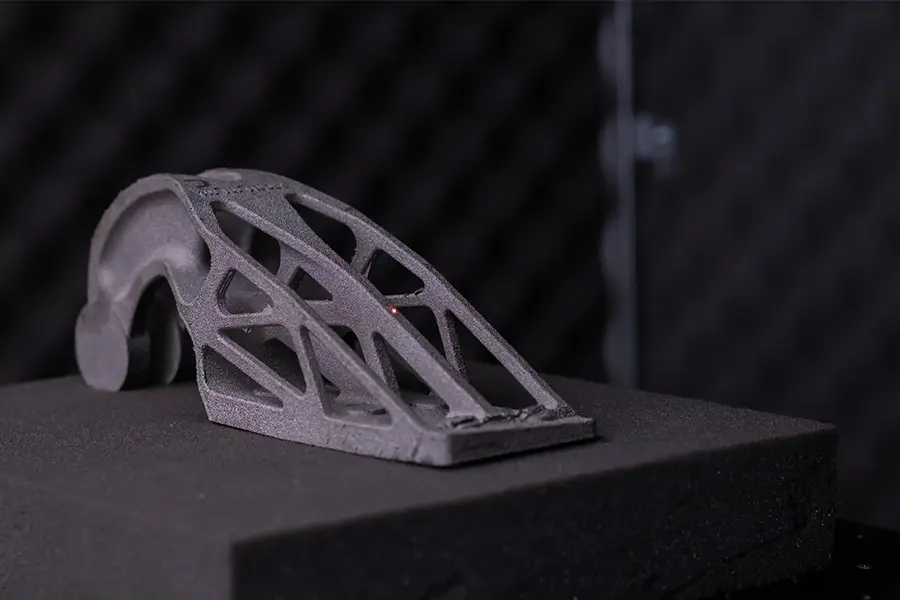
Addressing the challenges of additive manufacturing
Compared to more traditional manufacturing methods, additive manufacturing is still in its relative infancy. The process simply hasn’t had the same opportunities for materials development and working practice refinements that the more conventional technologies have in their decades of existence. Although still widely used for prototyping, largely due to a lack of confidence in quality assurance processes, those working in the AM industry have big ambitions for a much more instrumental use in scale manufacturing, but to truly accelerate the realisation of this ambition, particularly for critical and demanding applications, non-destructive testing will need to play a key part.
Even with the most seemingly reliable quality assurance solution to hand, it’s proving increasingly difficult to gain the confidence in the more traditional non-destructive testing methods’ abilities in flaw detection within additive manufactured parts. The unparalleled benefits that 3D printing has offered manufacturers has undoubtedly fuelled the rapid rise in the adoption of the technique across a variety of industry sectors. Increasing part complexity, a new-found ability to create lighter and more organic shapes, and a new wave of surface finish options are just some notable benefits that have proved to be the catalyst for the technique’s adoption within manufacturing processes across the globe, but new technological developments are often fraught with obstacles, and the versatility of additive manufacturing has also proved to be the source of its own problems when it comes to quality assurance.
The issue with existing NDT methods
Existing NDT methods have proved ineffective in delivering conclusive non-destructive testing results for additively manufactured components, largely due to the presence of its own set of unique flaws and failure mechanisms compared to more traditional components. Inter-layer bonding failure, trapped powder, microcracks, thermal stresses, and a lack of fusion are flaws entirely bespoke to this incredibly powerful manufacturing method, and ones that have subsequently caused quality assurance obstacles that, to date, have prevented additive manufacturing from reaching its overwhelming potential.
Non-destructive testing methods that have shown promise when testing additive manufactured components, like X-ray CT, can be utilised to an extent, but are far from ideal for the industry. The mass-manufacture ambition of additive manufacturing is simply not achievable with X-ray as a primary NDT technique due to the eye-watering cost per part test, safety concerns, sub-optimal image resolution (particularly when testing more intricate parts), and perhaps more significantly, the painfully slow test speeds. If these fundamental drawbacks haven’t forced additive manufacturers to seek faster, more reliable, and cost-effective methods, then there’s certainly another feature of additive manufacturing that will.
Theta Technologies’ revolutionary nonlinear resonance NDT technology, RD1-TT can be used at various stages of the production workflow but offers improved benefits when used immediately after printing.
The menace of post-processing
Yes that largely unwelcome yet necessary by-product of additive manufacturing, post-processing – The rather demanding procedure required to refine a 3D printed part into that impressive, finished article.
This often lengthy and grueling process has played a significant role in the challenges that manufacturers face in identifying whether 3D-printed parts are fit for purpose. In fact, post-processing is so significant in the overall additive manufacturing workflow that the faster production rates on offer are often negated by the hours spent perfecting the part during this stage. That’s not all. Imagine if you’d invested the time into post-processing a single part only to test it and discover it is in no way viable for use as an end-user part. Was the issue with the build or were the rigors of post-processing slightly too rigorous? Unfortunately, if you discover defects in components at this late stage, it’s probably not worth spending the additional time to find out.
Fortunately, thanks to Theta Technologies, this issue no longer needs to transpire as part of your workflow. The promise of a rapid testing solution that can be deployed prior to post-processing is the ideal preventative measure to avoid this costly problem. RD1-TT, which utilises Theta Technologies’ unique nonlinear resonance NDT offers manufacturers an immediate post-printing triaging solution for additive manufactured components, even while it remains on the build platform. This means that within minutes of the print of your beautifully complex part completing, you will know whether it contains flaws such as microcracks, trapped powder, or a lack of fusion that could compromise its integrity and ability to withstand the pressure associated with use. Should those flaws be identified at this early stage, you can simply pull the part from production prior to adding any unnecessary value – a game-changer for cost-savvy manufacturers looking to reduce unnecessary costs.
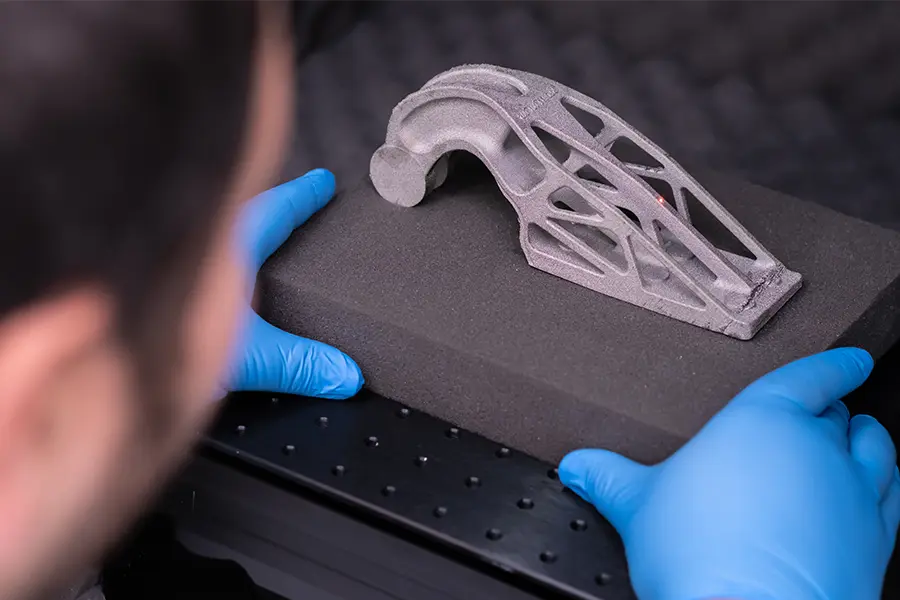
Image: An additive-manufactured hinge bracket that was subjected to the multi-stage non-destructive test process.
The Case Study
Project RASCAL: The background
For manufacturers looking to utilise 3D printing as their preferred technology for mass manufacture for critical applications and industries, it’s highly likely that they may need to embrace new non-destructive testing technology to transform that dream into a reality.
Theta Technologies’ nonlinear resonance NDT technique had been in development for some time prior to its unveiling to the world but project RASCAL was developed to showcase its untapped potential.
Project RASCAL (Rate Scalable NDT for AM), the subject of this case study, was an Innovate UK project derived from an Aerospace Technology Institute (ATI) funded project collaboration with the National Aerospace Technology Exploration Programme (NATEP) several years earlier. The objective of the project was to assess the possibilities of triaging additive manufactured components through non-destructive testing and highlighting the promising capabilities of Theta Technologies’ unique nonlinear resonance NDT technique.
Looking to expand on the initial successes of nonlinear resonance demonstrations by utilising its encouraging portfolio of benefits for the additive manufacturing arena, RASCAL aimed to develop a comprehensive, fast and economical non-destructive testing system for AM parts by exploiting data fusion from two contrasting NDT methods – Thermography and nonlinear resonance. The sentencing of the parts subjected to the test was to be performed in an automated manner by evaluation of user-defined inspection requirements.
Project framework
It’s not often we discuss how competing’ technologies can actually work together to achieve a common goal, but that’s exactly what we’re here to do.
Although Theta Technologies’ nonlinear resonance NDT solution can more than stand its ground as a sole NDT solution against the more tried and tested inspection methods such as X-ray CT, its unique ability in several key areas makes it the ideal companion as part of a quality assurance process designed to leave no stone unturned. The objective was to offer an automated system that utilised both complementary techniques to identify a wider panorama of flaws in metal additive manufactured components.
The Manufacturing Technology Centre (MTC) were instrumental in the development of project RASCAL. MTC set out to oversee key components of the project including the build and machine of all the AM parts, performing initial X-ray CT inspection of the produced AM parts to identify those with flaws, and the creation of a robotic automation system to perform the modular non-destructive tests on each AM component. The integrated demonstrator inspection system exploited inspection results from both the nonlinear resonance and thermography techniques to provide definitive data on whether the AM parts subjected to the test were flawed. The robotic cell demonstrator that was tasked with performing the automation system was, on this occasion, optimised for an additive-manufactured hinge bracket commonly used in aerospace.
…it’s unique ability in several key areas makes it the ideal companion as part of a quality assurance process designed to leave no stone unturned.
The defects
Defect types and component geometries were fundamental aspects to be considered during the initial design specifications and it was vital to utilise samples with a variety of known defects through the testing process to validate the overall detectability of the combined tests. The system designed could detect both internal and exterior flaws through the complementary techniques. Theta Technologies’ nonlinear resonance method would be tasked with identifying the internal flaws, and external cracks and notches would be identified via Sonemat Ltd’s thermography technique. The results of the system’s ability to detect the presence of differing flaws would be validated with the data from the initial X-ray CT scans. The system that had been designed and manufactured by the MTC could run autonomously and would be combined to indicate PASS/FAIL test results for each sample.
The process
Theta Technologies’ nonlinear resonance NDT technology offers manufacturers a rapid triaging solution to detect flaws within components. This non-destructive test can be performed in under one-minute, much faster than any other NDT technique. The rapid nature of the test resulted in nonlinear resonance performing the first of the two tests within the automated robotic system. Should nonlinear resonance immediately detect internal flaws, there would be no requirement for a continuation of the part in the multi-stage process.
The results
Nonlinear resonance
In an intact resonance system, the resonance frequency only very slightly reduces with an increase in the excitation amplitude. If the system contains compliant defects such as a crack, the resonance frequency reduces much more markedly with increasing strain. By comparing the relative shifts in resonance, the integrity of a test piece may be assessed.
Two hinge bracket samples were subjected to the complementary test process, one of which was planned without defects and the other featured a process crack. X-ray CT scans had already been performed on the two additively manufactured samples (ND1 and ND2) to identify the presence of any flaws and validate the results of the complementary study. Although the X-ray CT scans were perfectly capable of identifying flaws within these additive-manufactured samples, the test would take several hours per sample, rendering the technique ineffective for those looking to adopt 3D printing as their preferred mass manufacturing technique.
The nonlinear resonance results produced as part of the study compared the two samples (ND1 and ND2) and the nonlinearity factor (Fig C) showed clear differentiation at the varying strains. Sample ND2, which featured a crack, registered significantly higher on the nonlinearity factor.
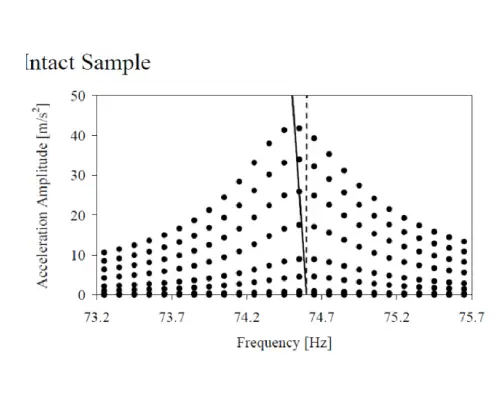
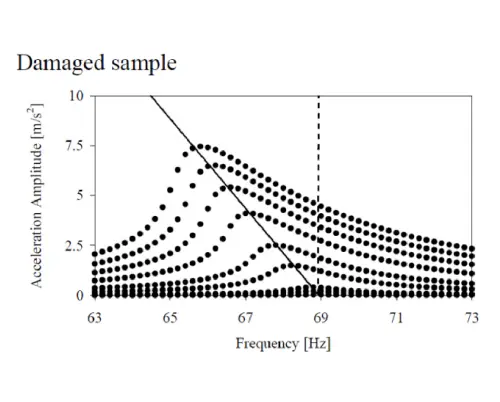
FIG A: Example of Nonlinear effect reported in the literature: K.E.A. Van Den Abeele et al, Nonlinear Elastic Wave Spectroscopy (NEWS) Techniques to Discern Material Damage, Part II: Single-Mode Nonlinear Resonance Acoustic Spectroscopy, Research in Nondestructive Evaluation, Vol. 12, 2000.
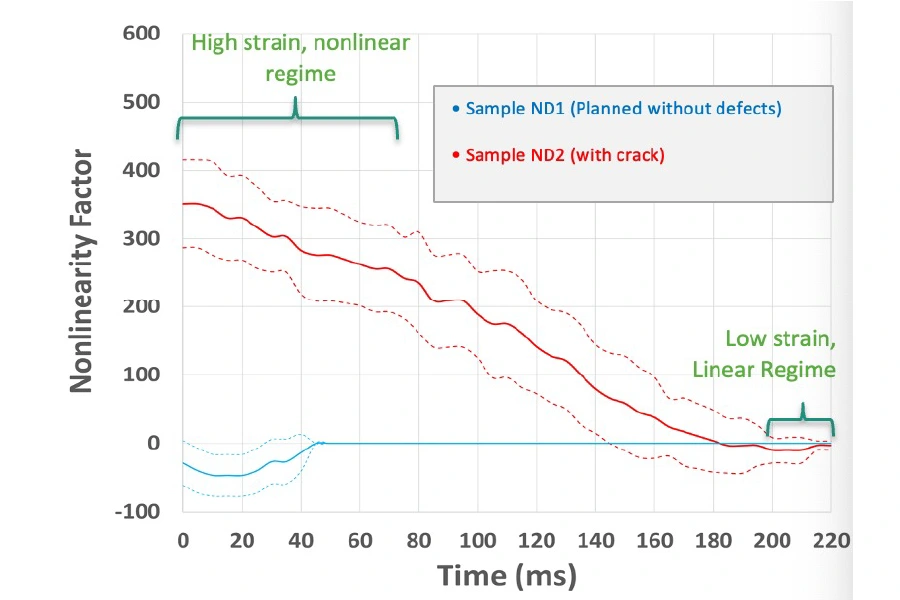
Fig C: Nonlinear resonance comparison of ND1 and ND2, showing clear differentiation at higher strains.
Thermography
Assuming the samples had passed the much quicker nonlinear resonance NDT test, the samples would move onto phase two of the multi-modal test. Supplied by Sonemat Ltd, the second stage of the automated complementary NDT process involved the surface inspection of cracks on the samples with a high-resolution FLIR thermal camera with a sensitivity (NETD) of 30mK. The camera featured a close-up lens with 50 µm spatial resolution and a hot air jet heat source ≈ 50 °C. Evidence of defects on the surface of the samples were identified during this process.
Should mass manufacture be your goal, there is only one solution that offers manufacturers the opportunity to quickly triage 3D-printed parts…
The conclusion
When it comes to safeguarding the brand value and the integrity of your manufactured products, an effective quality assurance process is of utmost importance.
Customers expect the very best and anything falling short of this could prove costly to that reputation and your business. Although this brand reputation is important, it pales in significance to the ultimate goal of any quality assurance process in ensuring that manufactured parts are safe for their intended use, especially for safety-critical applications in industries such as aerospace, power generation, and defence.
Embracing additive manufacturing
For those adopting additive manufacturing as their preferred manufacturing method, the non-destructive testing options available to help eradicate the threat of delivering sub-optimal and unsafe parts to customers have failed to deliver. For most, that has simply meant not having the confidence to utilise 3D printing beyond prototyping. With the introduction of NDT techniques like Theta Technologies’ nonlinear resonance, those concerns are set to become a thing of the past.
The reality is manufacturers of critical components are likely to have already invested in non-destructive testing technology in some capacity. Whether you outsource your testing or have a seemingly rigorous internal process, there’s never been a better time to reassess your quality assurance practices. Of course, the ability to change or add to established workflows will depend on several factors, with cost almost certainly top of that list of considerations, but if you’re not getting the results you need, it’s time to make a change.
The mass-manufacture ambition
What project RASCAL has sought to prove is how seemingly competing technologies can be used as complementary techniques to satisfy the specific needs of the customer, but ultimately the decision on your NDT method will depend on the type of information you require from your evaluation of manufactured parts. Industry-leading methods like X-ray CT for the most part will deliver satisfactory results when evaluating additive manufactured parts to pinpoint the source and type of common flaws, but incredibly slow test speeds, high costs, and a need for increased expertise are far from suitable for those looking to adopt additive manufacturing at scale. Should mass manufacture be your goal, there is only one solution that offers manufacturers the opportunity to quickly triage 3D-printed parts and identify the more challenging flaws associated with 3D printing – nonlinear resonance NDT. Whether you’re new to non-destructive testing or already have an established process using traditional methods, Theta Technologies’ revolutionary technique can integrate seamlessly into existing production workflows to help solve those unexpected inconsistencies with the quality assurance process of additively manufactured parts.
Although the technique can be utilised at multiple stages of your workflow, the deployment of nonlinear resonance non-destructive testing at the very start of that quality assurance process will offer manufacturers maximum benefit. Nonlinear resonance’s unique ability to detect flaws at the earliest possible opportunity (immediately after the build) and prior to costly post-processing procedures will all but eradicate the possibility of working with flawed components longer than necessary, resulting in those impressive cost and time-saving benefits for manufacturers of AM metal components.
other publications
Whether you’re looking to stay up-to-date with our latest news or read about how our game-changing non-destructive testing technology is helping our customers, we’re certain that our rapidly expanding digital publication library has something for you.
Issue #1
Theta Technology News
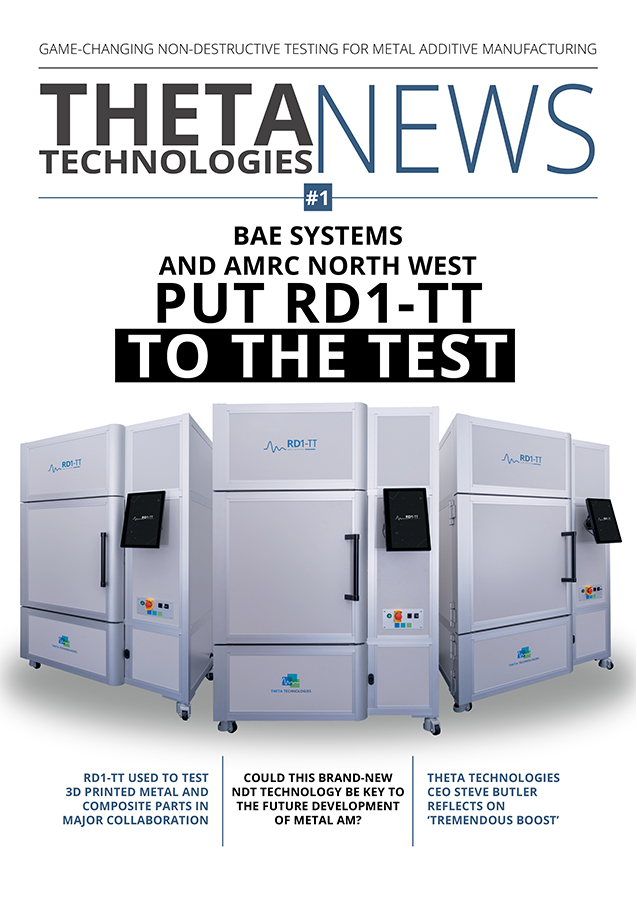
BAE Systems and AMRC North West put RD1-TT to the test in major collaboration
Issue #1
The Case Study
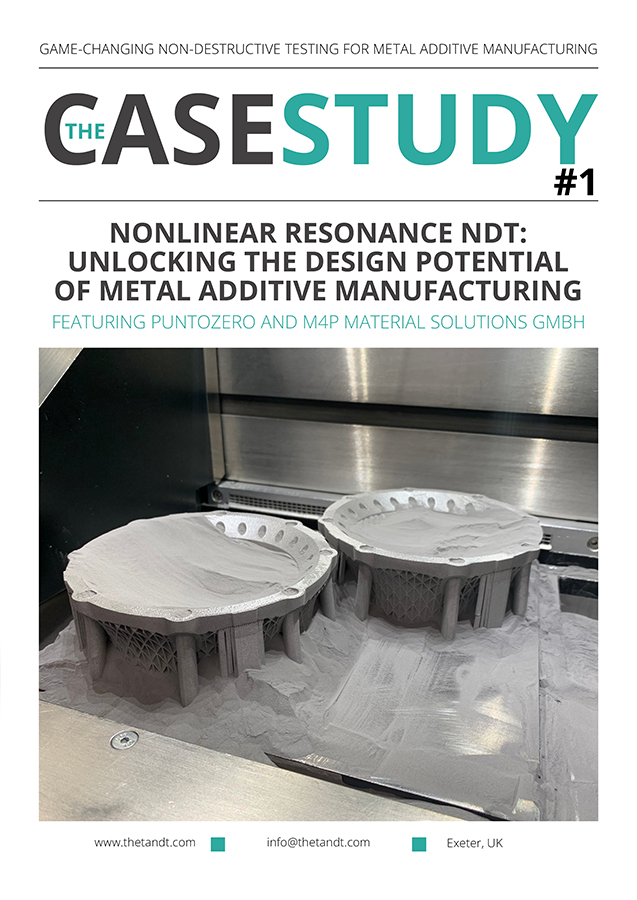
Nonlinear resonance NDT: Unlocking the design potential of metal AM. Featuring Puntozero and m4p material solutions GMBH
learn more
Find out more about this revolutionary NDT technology from the team that built it.
Address
Theta Technologies Limited
3 Babbage Way
Exeter Science Park
Clyst Honiton
Exeter
EX5 2FN
United Kingdom
Terms & Conditions Privacy & Cookie Policy Anti-Slavery Policy © Theta Technologies. 2024
