The Case Study
Issue 3
Nonlinear Resonance NDT testing of Metal AM star artefact samples
An in-depth non-destructive testing case study featuring Laboratoire National de Métrologie et d’Essais (LNE)

The need for non-destructive testing
Why NDT is a must for manufacturers of safety-critical components
When it comes to non-destructive testing (NDT), there are plenty of options to choose from, but for 3D-printed metal components, the inability of those existing options to provide accurate and reliable NDT results has all but prevented metal manufacturers from embracing this incredibly versatile technology.
Excessive costs, slow test speeds and unreliable results when testing increasingly complex geometries have failed to provide manufacturers with the confidence they so desperately need when producing end-user parts for applications where failure is simply not an option.
There is however a solution. A reliable, cost-effective NDT technique bought to you by UK-based Theta Technologies. Their unique nonlinear resonance technology is designed to cope with the part validation challenges that the additive manufacturing (AM) industry has been faced with, and finally offers AM manufacturers those highly sought-after results required to unlock its true potential.
Metal AM: The Challenges
The evolution and continuing adoption of 3D-printing as a manufacturing method comes as no surprise. Already widely used for polymers and plastics, the potential to quite literally create something out of nothing has opened a plethora of design opportunities for manufacturers. The production of more organic, lighter, and more complex geometric components has undoubtedly fuelled the rise in the technology’s popularity, but this unparalleled versatility has also been the source of growing frustration within the industry, particularly for the production of metals.
Companies seeking to convince their customers of 3D-printing’s effectiveness compared to traditional metal manufacturing methods have proved to be one of the biggest challenges. Unfortunately, this issue is not something that can be solved by the manufacturers themselves. Confidence in metal additive manufacturing can only be delivered through the implementation of a rigorous quality assurance process, and one that includes suitable non-destructive testing.
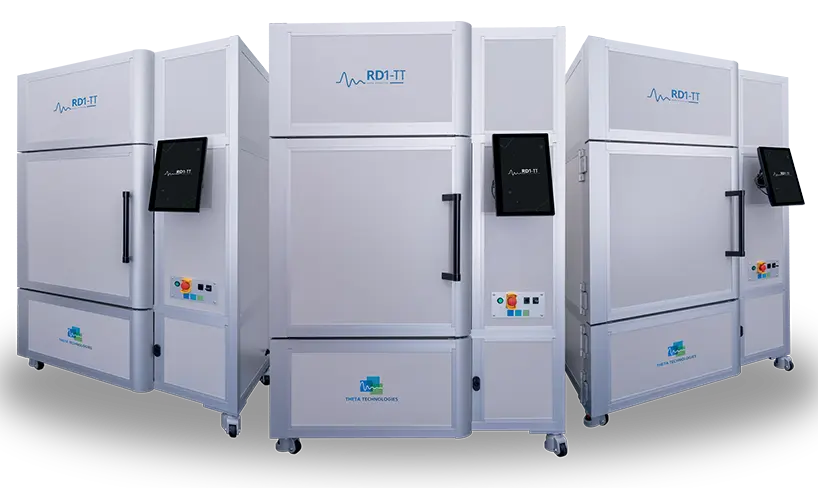
Theta Technologies’ revolutionary RD1-TT non-destructive testing solution.
Non-destructive testing is a must for manufacturers of parts produced for applications where failure could result in unimaginable consequences.
There are plenty of industries where this is applicable: aerospace, defence, automotive, medical, and power generation are just a few. Non-destructive testing allows manufacturers of those parts to identify flaws before they become an issue.
Defects can take many forms. Voids and porosities, creep, delamination, and of course cracks are some of the most common to occur across a range of materials. There are however some common defects that are bespoke to additive manufactured parts, including the star artefacts featured as part of this study. In addition to those defects mentioned above, metal AM parts are also vulnerable to unconsolidated/trapped powder, lack of fusion, layering defects, and distortion, all of which could compromise the integrity of the part and its ability to withstand the pressures of use.
Enter Theta Technologies
Theta Technologies’ unique non-destructive testing technique entered the market in 2022 in the form of their first commercially available product, RD1-TT. Derived from nonlinear acoustics, nonlinear resonance has been designed to offer a rapid, reliable testing solution for metal additive manufacturers and is capable of testing virtually any 3D-printed metal component for those potentially detrimental flaws.
The technique exploits microscopic flaw behaviours within samples to help identify signs of defects. The entire component is excited into resonance using a variety of signal sources and a detector system assesses for nonlinearity. The signature of the component is closely monitored during the excitation process and defective samples would exhibit an amplitude dependent frequency response. Should that response show signs of nonlinearity, the part is flawed.
The very nature of the technology means that it can test the increasingly complex geometries now available through 3D-printing, is unaffected by the surface roughness inherent of additive manufacturing, and can be performed independently without the need for ‘known good’ reference samples. In fact, RD1-TT and nonlinear resonance boast an impressive portfolio of credentials in the testing of additive manufactured parts.
Immediate post-printing inspection helps identify flaws at the earliest opportunity before value is added during post-processing
Identification of tiny flaws that other technologies cannot see
Provides a rapid testing process (under one minute)
The ability to test increasingly complex geometries
Unaffected by surface roughness inherent of additive manufacturing
No need for reference parts
Can be operated without the presence of highly trained operators
NDT compared
The benefits of the technology are unrivaled and now means that those hoping to embrace 3D-printing as their preferred metal manufacturing method have access to a reliable NDT solution. A comparison of some of the most widely used non-destructive testing options is shown below (Fig A).
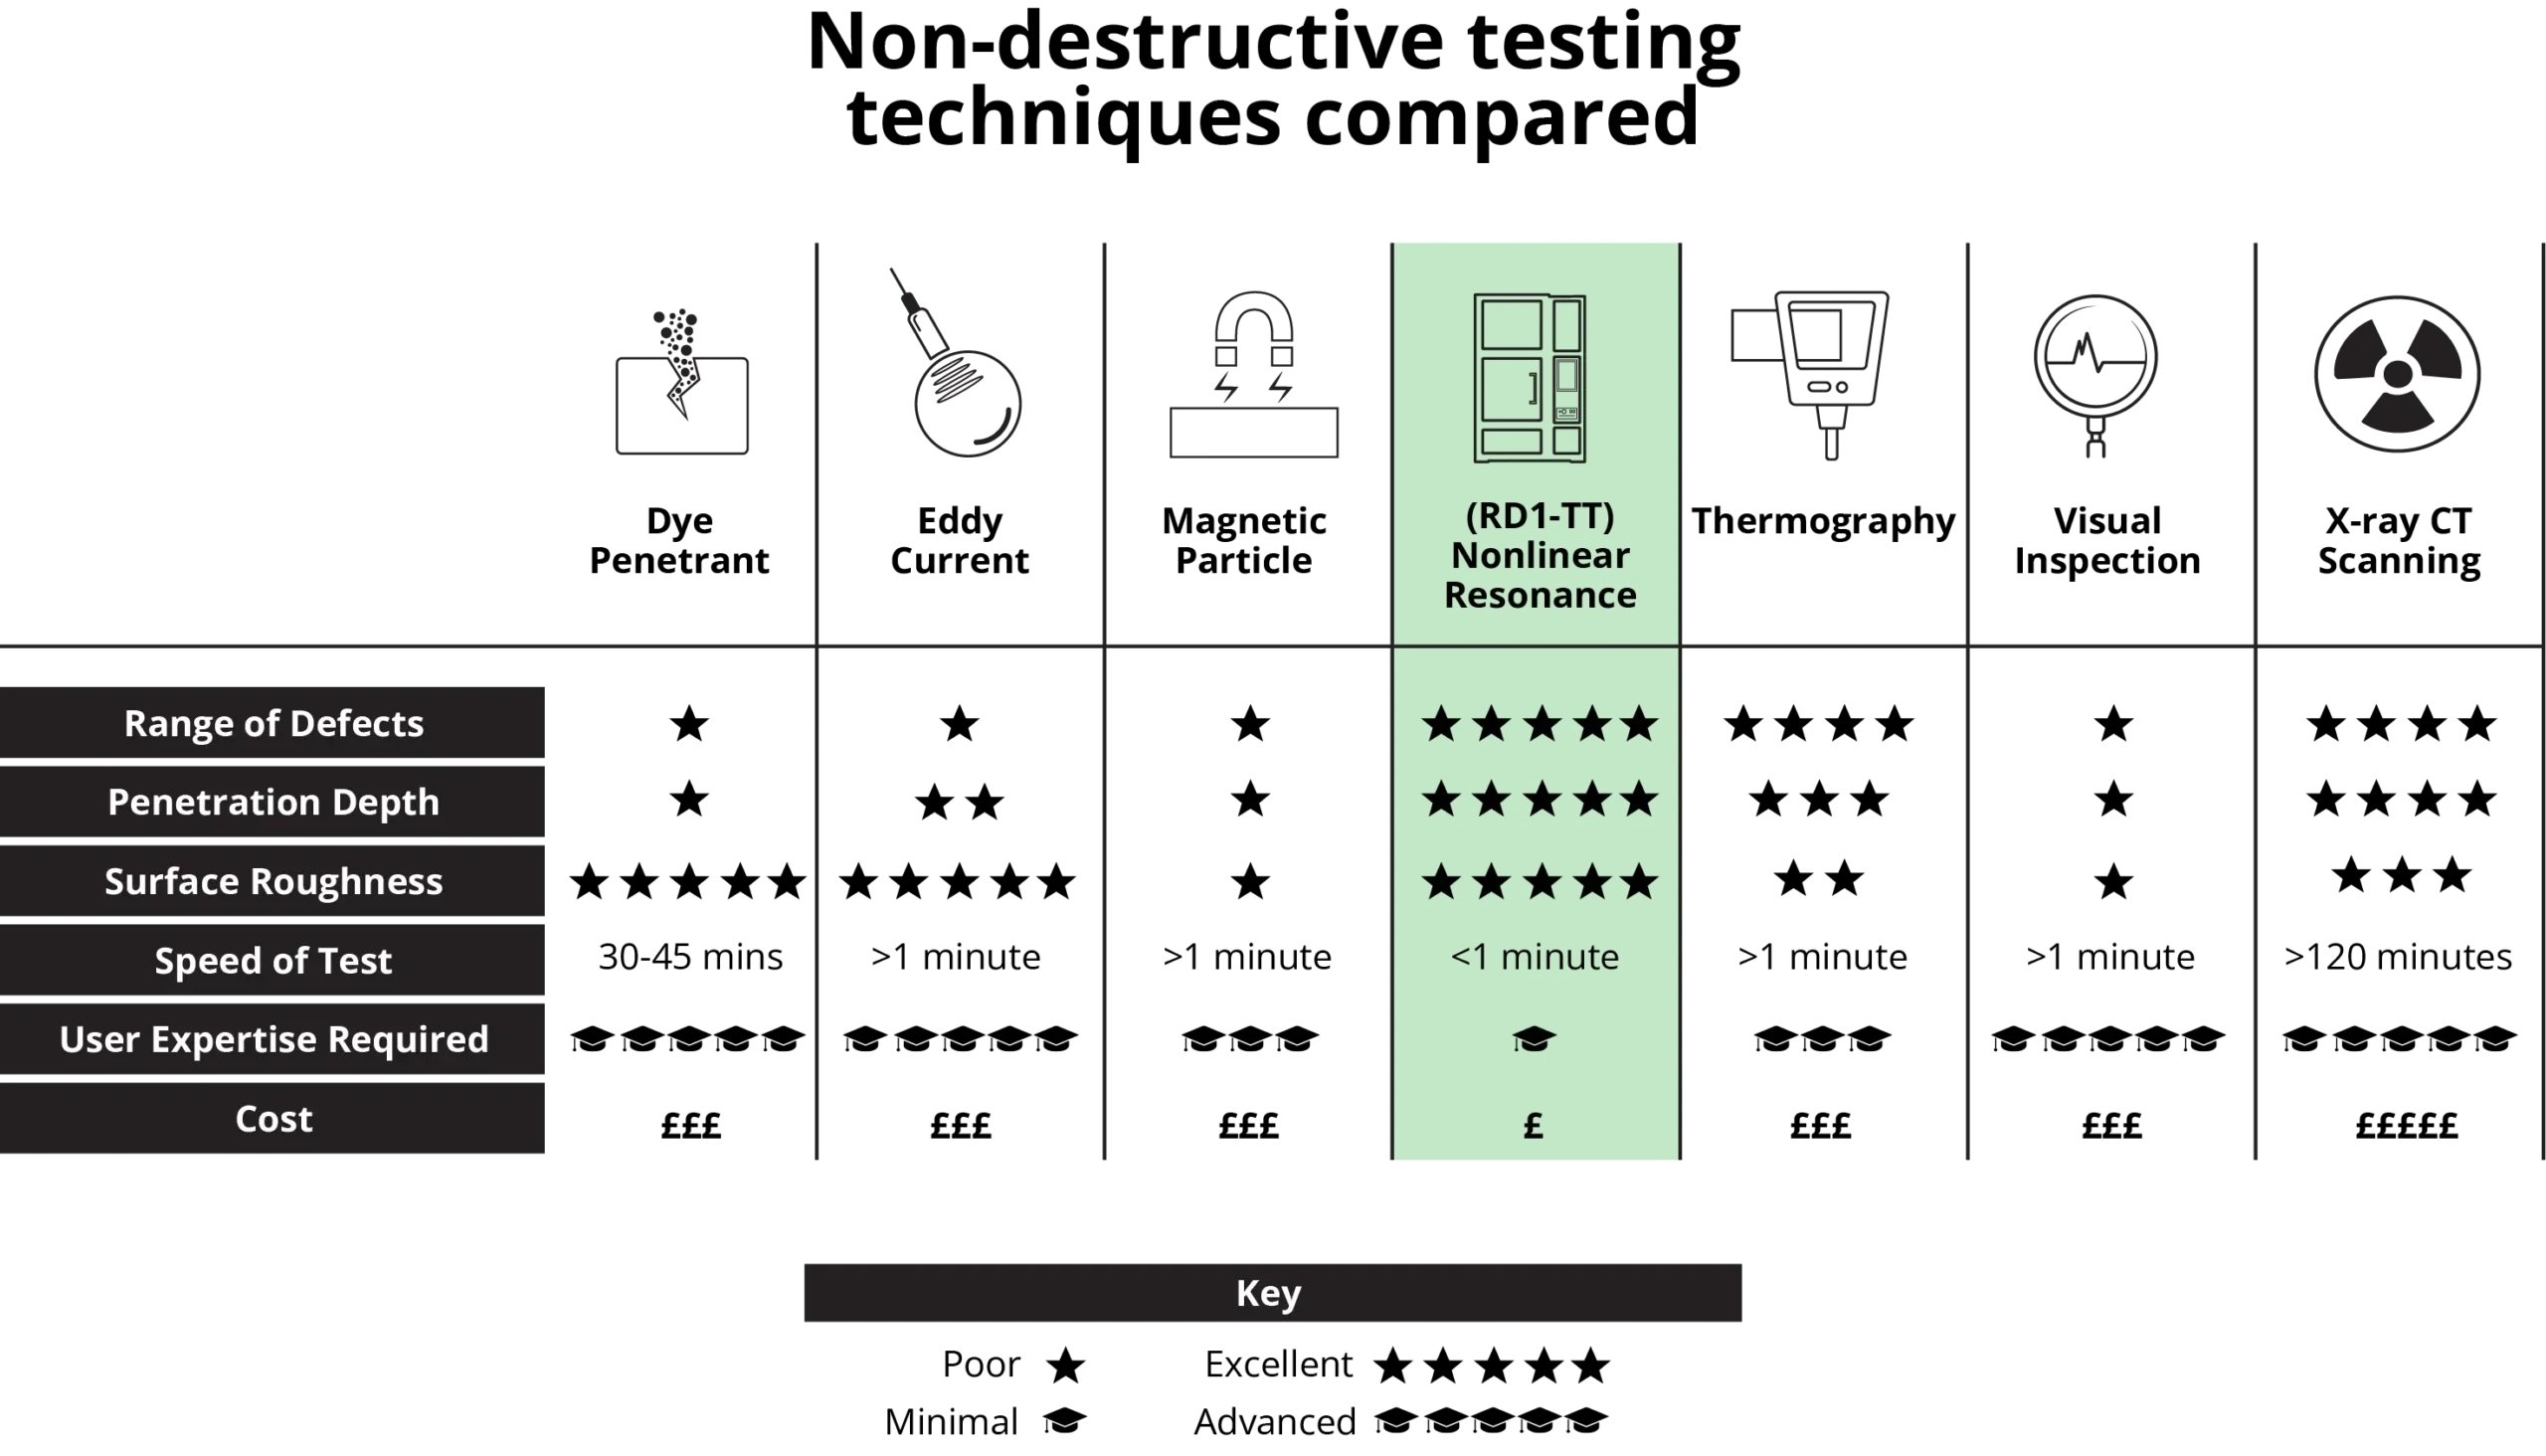
Fig A: A comparison of a number of non-destructive testing techniques available to manufacturers.
Embracing the new
Let us face the facts, new technology can often be difficult to embrace. Take 3D-printing for example. Despite being introduced in the mid-1980’s, it took a considerable amount of time for it to be taken seriously as a viable manufacturing technology. In fact, it was not adopted on scale until nearly two decades later. It goes without saying that as technology evolves, new opportunities materialise, and nonlinear resonance NDT is primed to support additive manufacturers looking to take the technology to the next level – the production of complex, mass-manufactured parts for safety-critical and demanding applications.
Theta Technologies understands the challenges that come with trusting new technology and have been working with a number of customers and project partners to validate nonlinear resonance as an effective non-destructive testing solution for metal additive manufacturing.
RD1-TT has been proven to consistently deliver on its impressive flaw detection credentials. Complex additive-manufactured valves, nickel superalloy turbine blades, and notoriously intricate 3D-printed heat exchangers are just some of the components that have been subjected to a series of successful nonlinear resonance NDT processes. RD1-TT is also currently being utilised as part of a major project collaboration between Theta Technologies, aerospace and defence titans BAE Systems, and the AMRC North West to test its effectiveness as a rapid solution for mass manufacturing.
RD1-TT has been proven to consistently deliver on its impressive flaw detection credentials
The Case Study
Nonlinear resonance testing of metal AM star artefact samples
The latest work to put nonlinear resonance NDT under the microscope is a collaborative project between Theta Technologies and the French National Metrology Institute (NMI), Laboratoire National de Métrologie et d’Essais (LNE) whose primary objective was to provide a comprehensive comparison of different non-destructive testing techniques to the ISO/ASTM standardisation joint group JG59 standards group for NDT for AM parts.
RD1-TT would be tasked with testing 3D-printed metal star artefacts, produced by LNE at the National Institute of Standard and Technologies (NIST) in USA, in order to determine the level of nonlinearity within the samples. LNE-NIST set Theta Technologies the challenge to detect flaws that may be present within the samples using nonlinear resonance NDT.
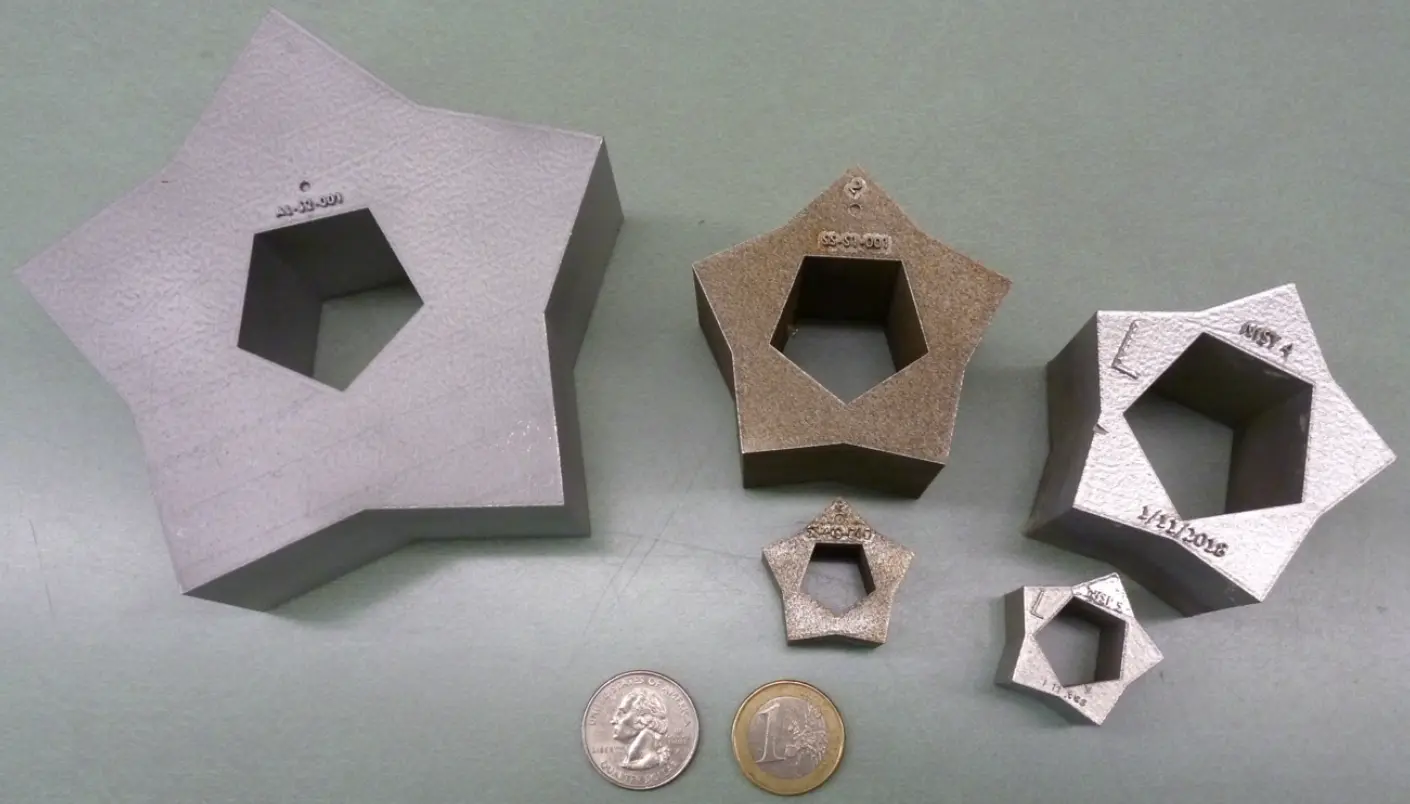
As part of the study, Theta Technologies was provided with a small sample of star artefacts (seen above), the geometry of which was used to help develop the ISO/ASTM industry standard as a test geometry for non-destructive testing. The samples, measuring approximately 60mm x 45mm were additively manufactured using laser powder bed fusion in Cobalt-Chromium and had previously been subjected to an array of conventional non-destructive testing methods.
Whole-body inspection
Resonant Ultrasound Spectroscopy (RUS)
Process Compensated Resonance testing (PCRT)
Selective inspection methods
Ultrasonic Waves
Conventional Ultrasonic Waves (CUT)
Phased Array Ultrasonic Testing (PAUT)
Other inspection methods
X-ray Computed Tomography using Synchrotron Radiation (SRXCT)
These non-destructive tests offered varying levels of success when faced with testing the additive-manufactured star artefacts. Despite some clear benefits such as an ability to identify the type and location of the defects, fewer size restrictions and real-time imaging, selective inspection methods and X-ray CT scanning have proved notoriously unsuitable when testing additive-manufactured samples. Lengthy part setup requirements, a restriction on geometry, ineffectiveness for volume production, a heightened level of expertise requirements, and restrictions in surface roughness have all contributed to the misfortunes of existing NDT methods in the provision of reliable results for metal AM parts.
Unlike the other techniques, nonlinear resonance takes a direct measurement of the nonlinearity present in individual components and eradicates the need for reference parts. Judgements can be made on a very small number of samples as an ideal, flaw-free part would exhibit zero nonlinearity.
Nonlinear resonance: The Test
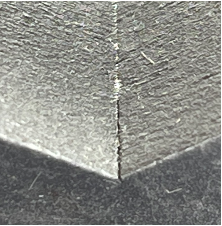
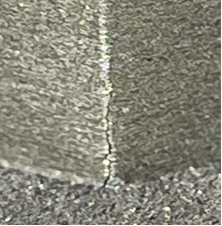
The tests of the star artefacts were carried out using RD1-TT, which makes use of an excitation source and laser measurement tool. Nonlinear resonance results are summarised as a ‘Damage Index’ metric, which helps identify the severity of the flaw present within samples. Upon provision of the samples, visible cracks were observed on the surface of the star artefact samples labelled NIST3 and NIST4, but none were visible on the star artefact sample labelled NIST2.
This meant that the visibly damaged samples should exhibit signs of nonlinearity in the response during the test. A key component of a nonlinear resonance non-destructive test is reproducibility measurements, which validates the results over multiple tests of the same component. Nonlinear results are then plotted on the damage index for each of the reproducibility tests. As the results demonstrate (Fig B), there is clear differentiation in the damage index for each of the samples. Those samples that had previously been identified as flawed from a combination of visual inspection and the previous non-destructive tests expectedly registered higher damage index results. Sample NIST2, which had no obvious flaws on the surface, registered the lowest and did not reveal any significant flaws present that would prove detrimental to the integrity of the component.
Sample NIST 2
Sample NIST 3
Sample NIST 4
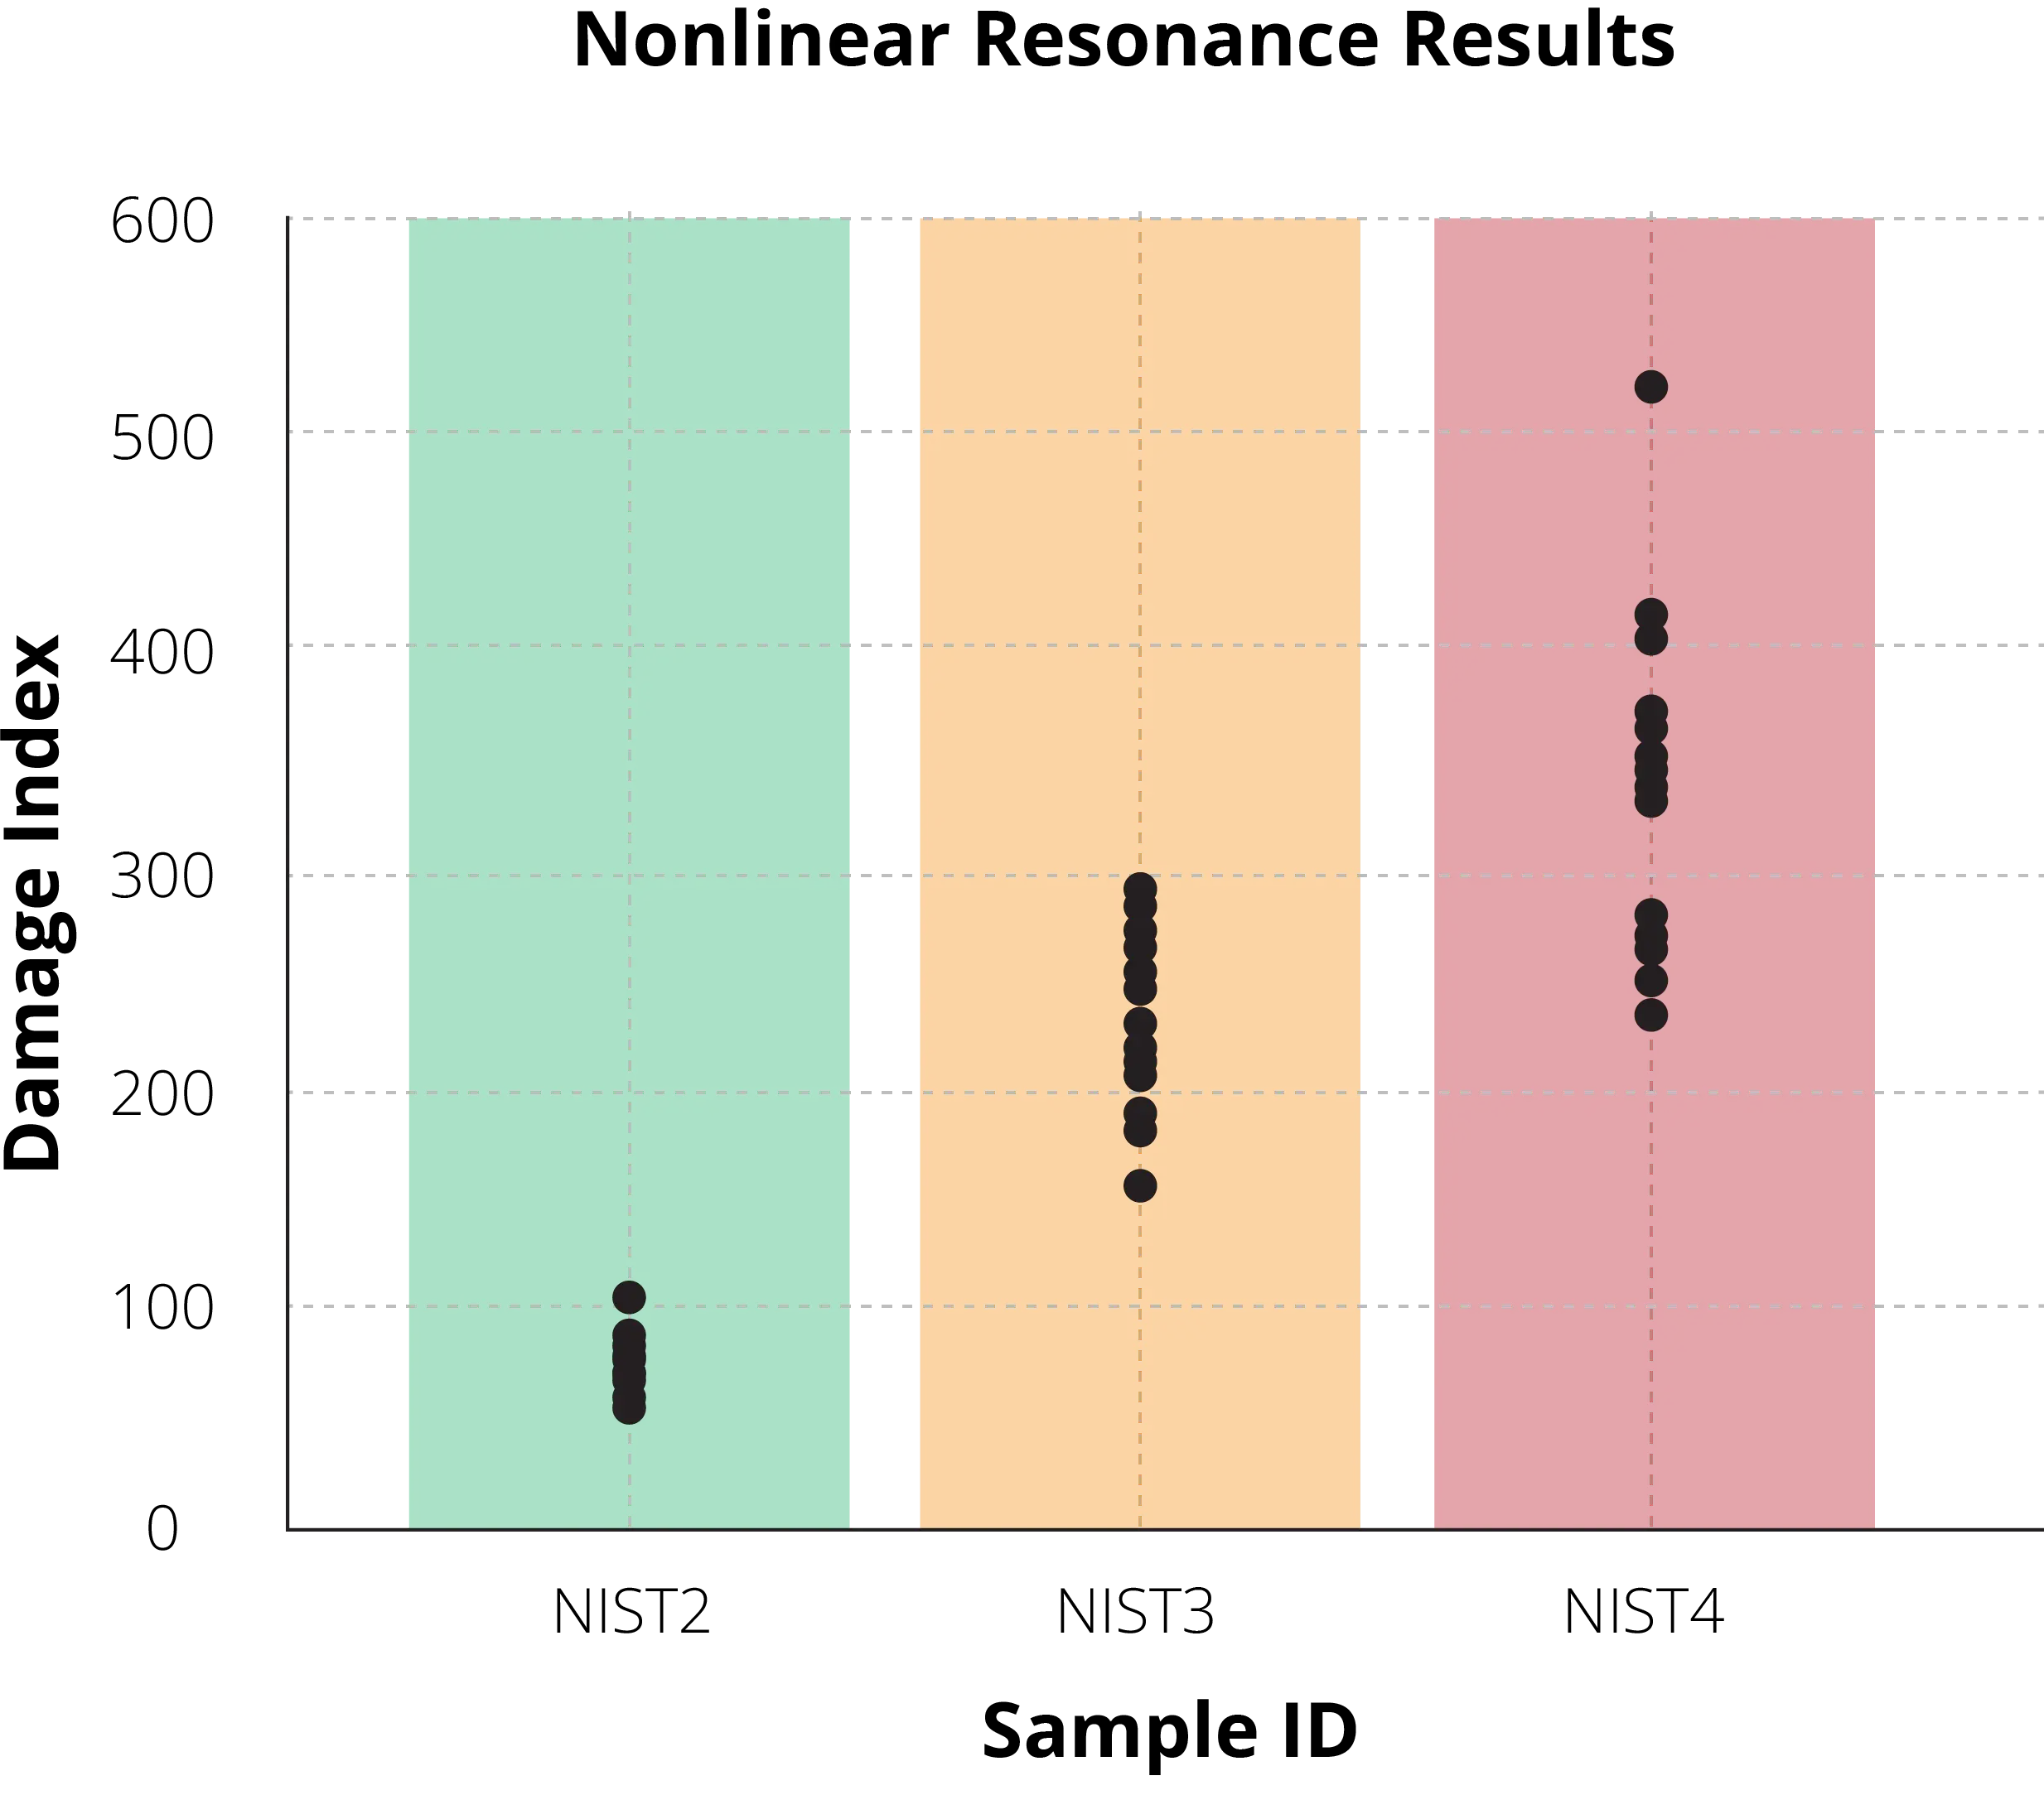
Fig B: The nonlinear Resonance ‘Damage Index’ test results for the star artefact samples.
Additional Data
Although the primary objective of a nonlinear resonance test is to identify whether a component is defective, additional linear data is also obtained as part of the procedure. Linear metrics are associated with differences in material properties and dimensions.
Samples can be ranked by their dimensions and that information is then passed on to the customer. This measurement proves particularly beneficial for manufacturers who have limited tolerance for changes in the size and shape of their products, or indeed those who must ensure that each of their manufactured parts share the same material properties. The complimentary linear metrics obtained as part of the study of the star artefact samples clearly differentiate between the samples, with the artefact labelled NIST 4 showing considerably different linear measurements to both NIST 2 and 3.
The difference in the linear results received as part of this study is directly attributed to the manufacturing process of the artefacts. NIST2 and 3 were manufactured with a number of intentional CAD defects (Fig C) in the form of cylindrical voids, whereas star artefact sample NIST4 was produced with no planned defects. The clear difference in linear results (Fig D) immediately allows for the identification of samples that share similar material properties.
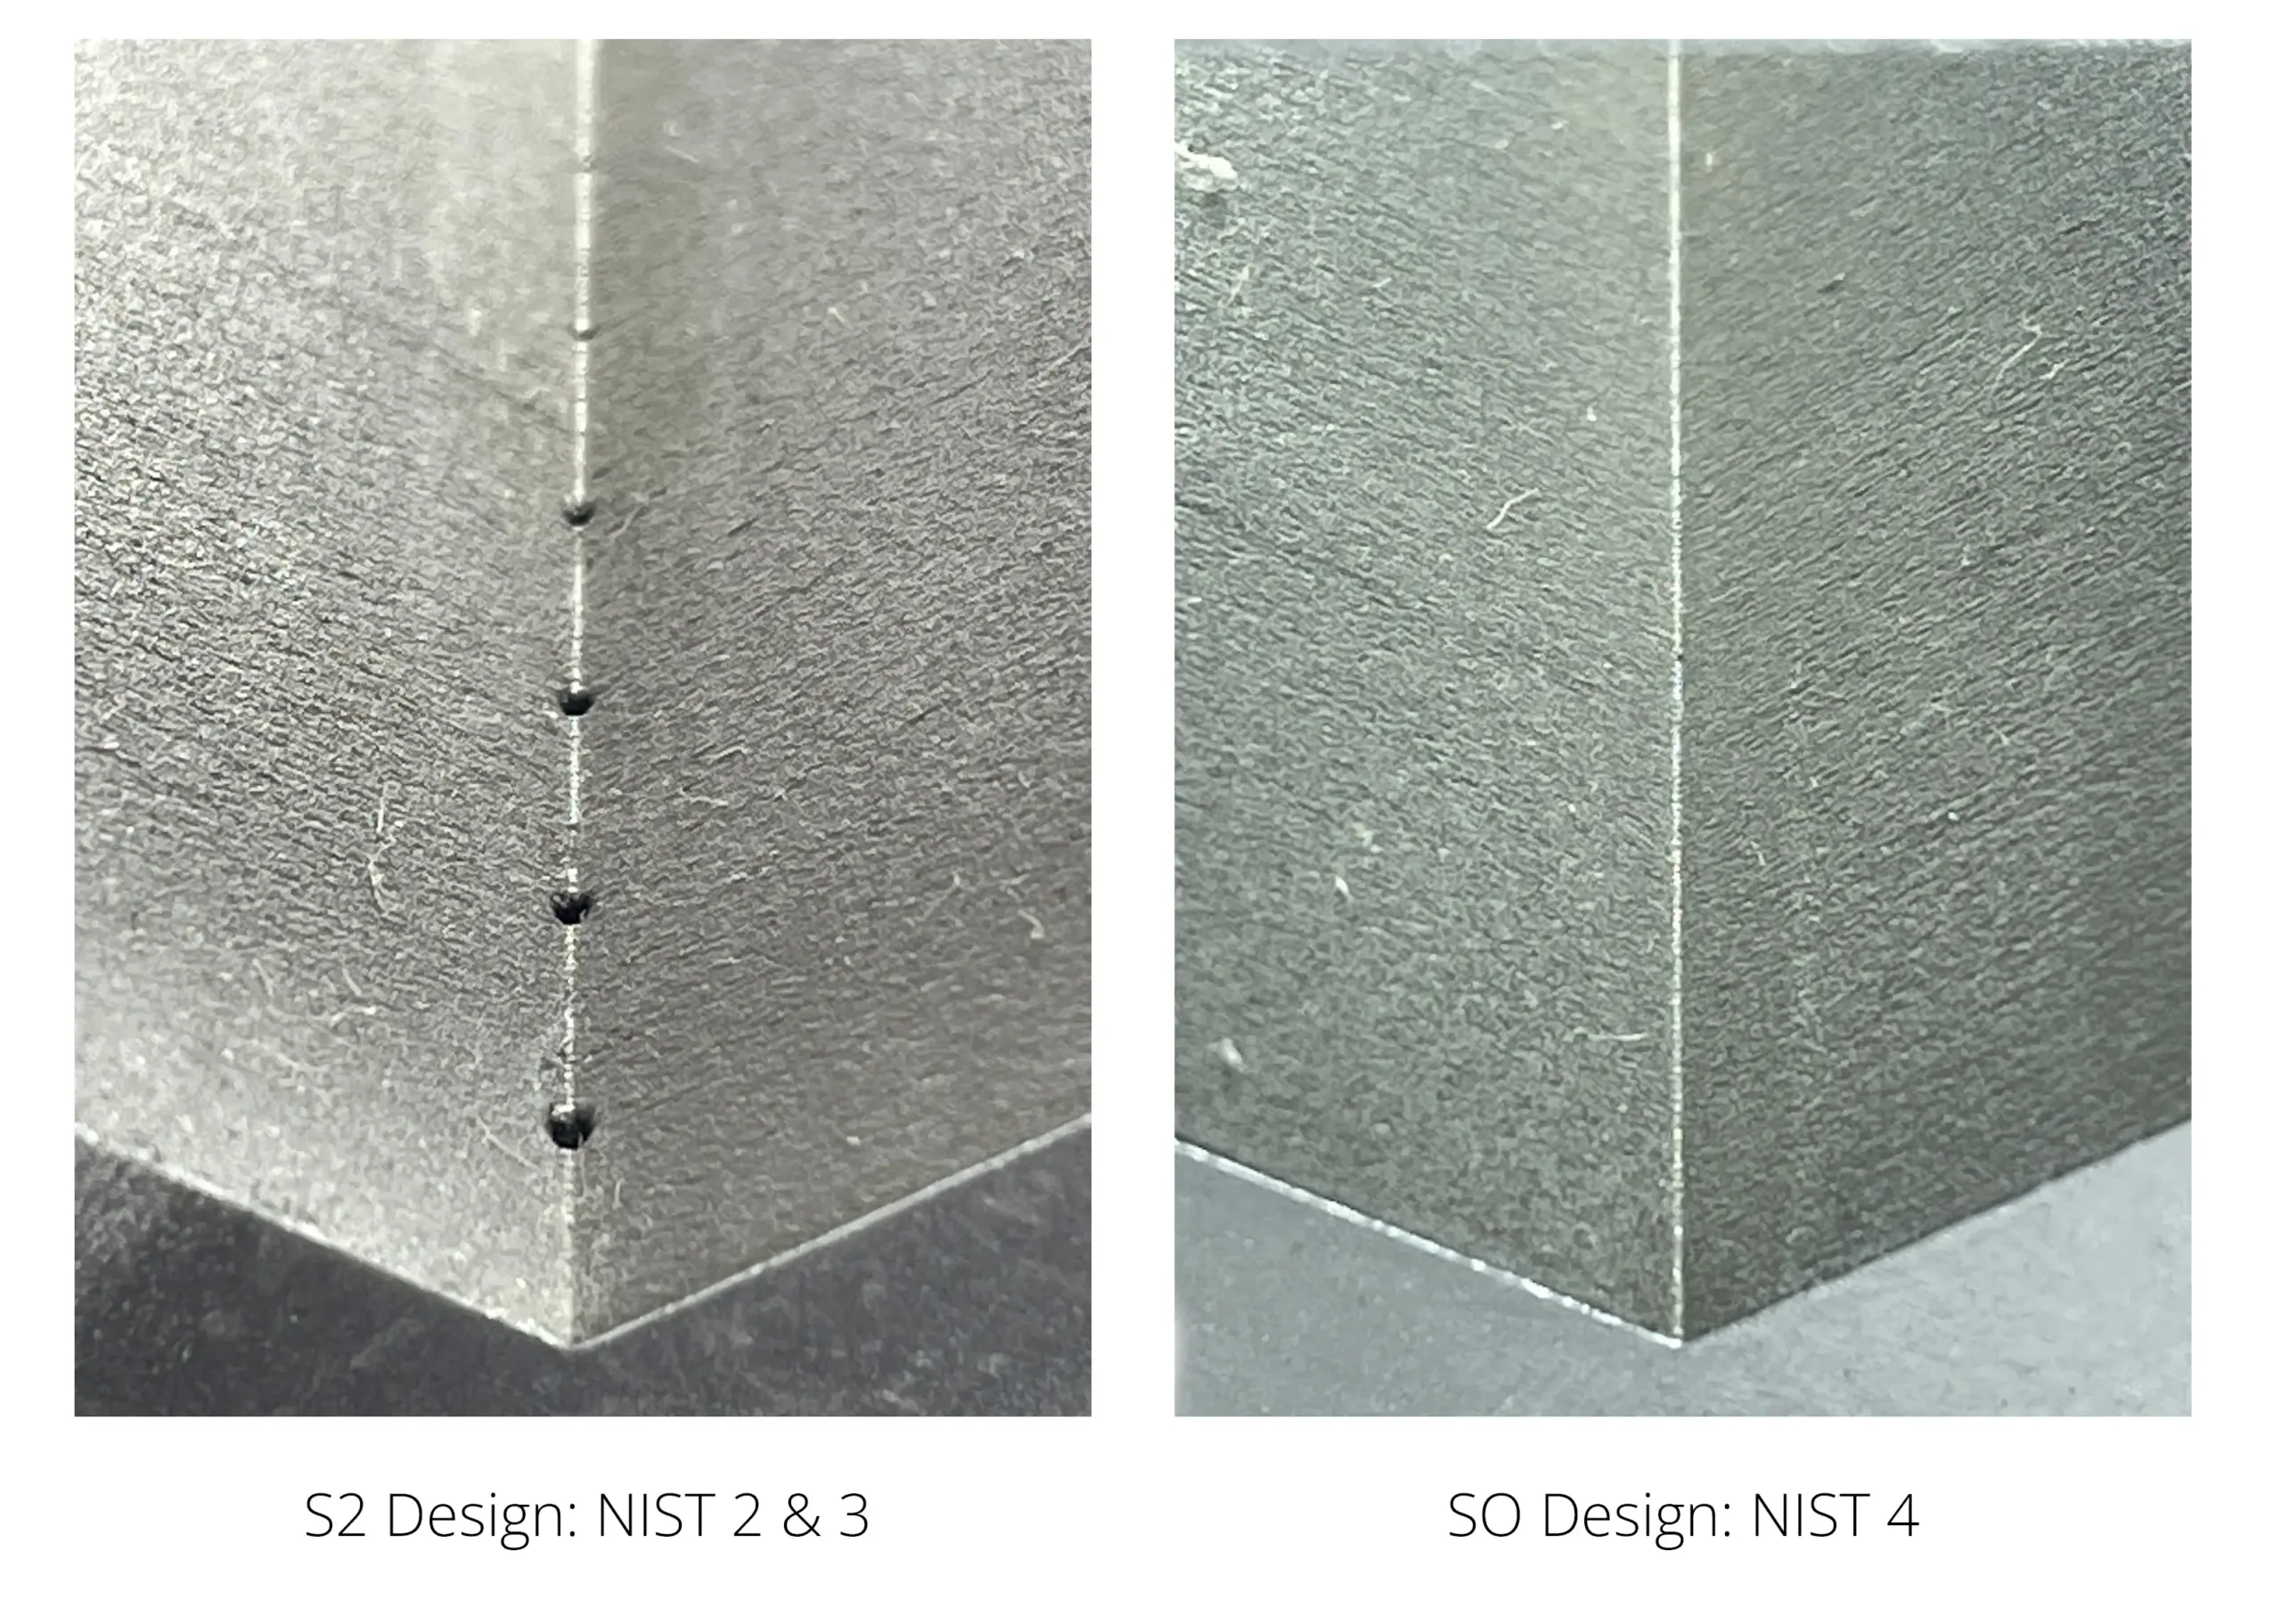
Fig C: Star artefacts NIST2 and 3 were manufactured with intentional CAD defects in the form of cylindrical voids. NIST4 was produced without the same CAD defects.
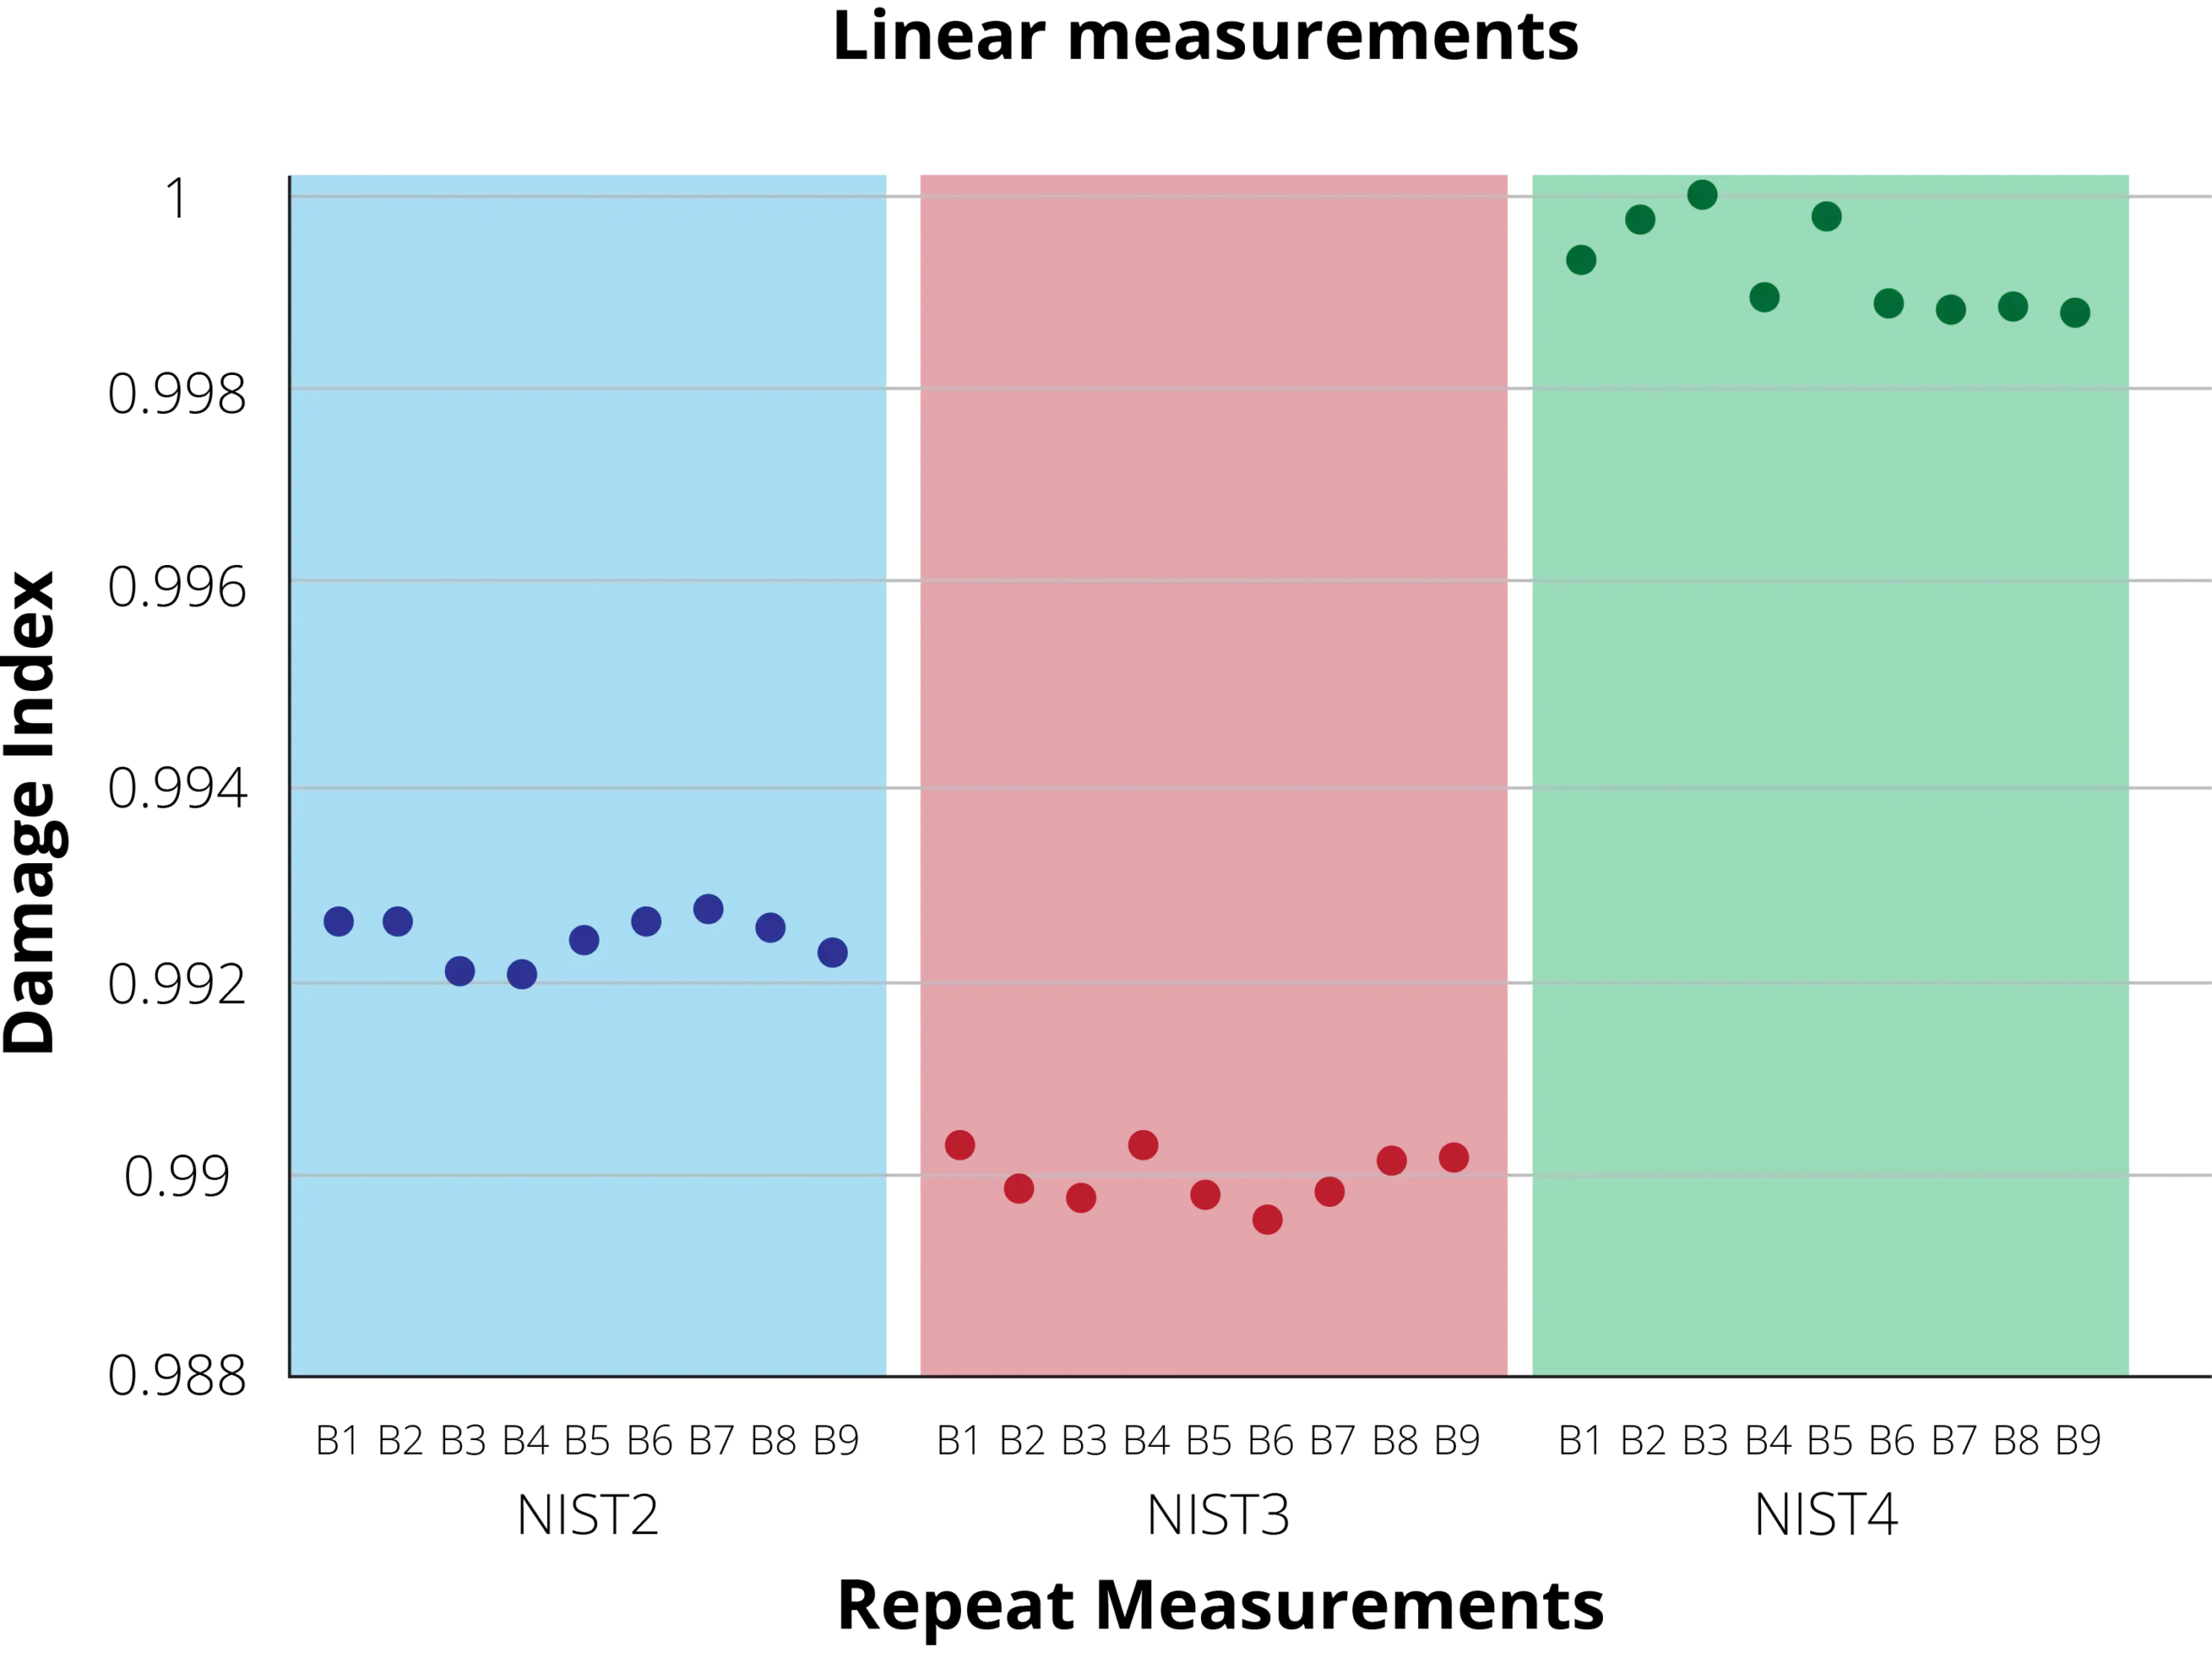
Fig D: The linear metric data obtained as a by-product of a nonlinear resonance NDT test.
The system developed by Theta Technologies is very interesting as it allows manufacturers to perform linear and nonlinear resonance tests.
The Conclusion
Upon provision of the samples, it was immediately identified that two of the three samples, NIST3 and NIST4 exhibited visible cracks. A nonlinear resonance non-destructive test of these components should be able to easily identify these defects with a nonlinear response in the signal.
The remaining sample, NIST2, which had no visible cracks or defects would subsequently register a low damage index score should the internal construction of the sample remain flaw-free.
As expected, a series of nonlinear resonance tests clearly demonstrated differentiation between the two visibly cracked samples, and the one that was crack-free. Within the context of a production workflow, these flaws could have been identified immediately after printing using RD1-TT, meaning that those parts could have been removed from the manufacturing process prior to post-processing procedures being undertaken, saving time, cost and resources in the process. The additional complimentary linear metric data obtained as a by-product of the nonlinear resonance test also highlights visible differentiation between the parts, which is normally due to the difference in material properties of the samples. On this occasion, the linear metrics reveal a differentiation between samples that exhibited planned CAD defects NIST2 and NIST3, and that with no planned defects, NIST4.
When asked to comment on the success of the study, Researcher in metrology for Additive Manufacturing at LNE, Dr/Habil. Anne- Françoise Obaton stated that “The system developed by Theta Technologies is very interesting as it enables manufacturers to perform linear and nonlinear resonance tests that are complimentary. The cracks, which display typical nonlinear behaviour, can be detected with the nonlinear module, whereas cavities full of powder, which don’t have a nonlinear behaviour, can be detected with the linear module of Theta Technologies’ system”.
Theta Technologies’ Research and development Manager, Dr Daniel Rodriguez Sanmartin, who helped coordinate the project added “This case study demonstrates detection of cracks using nonlinear resonance. For below surface contact cracks, dense materials, and complex geometries, these may not be detected by other NDT methods. The speed of nonlinear resonance enables a viable AM workflow with 100% testing and identification of deviations in material properties or dimensions at every post-processing step.”
It goes without saying that if all defects were as obvious as the cracks exhibited on the surface of the 3D-printed star artefacts supplied by LNE-NIST in this study, there would be very little need for NDT; however, what Theta Technologies have been able to demonstrate with this, and indeed the other studies, is that their unique nonlinear resonance technique is more than capable of identifying flaws, regardless of their location within additive manufactured components.
What next for Metal AM?
The unquestionable potential of additive manufacturing is yet to be fully unlocked, largely as a result of ineffective NDT options with the ability to cope with the technique’s incredible flexibility. This has often confined metal AM components to mere prototypes rather than allowing them to flourish as end-user parts. If manufacturers of safety-critical components are to make that desired transition from prototyping to end-user part production, an effective non-destructive testing solution is paramount.
Nonlinear resonance offers additive manufacturers that highly sought-after solution, with a rapid, cost-effective NDT technique capable of delivering reliable results when faced with the increasingly complex components inherent of 3D-printing. RD1-TT not only promises to provide the NDT solution capable of unlocking metal additive manufacturing’s overwhelming potential, but also to speed up the acceptance of additively manufactured parts to wider industries.
RD1-TT, Theta Technologies’ first commercially available product is available now.
To find out more about this revolutionary machine, or book a demonstration to witness the impressive capabilities yourself, you can contact a member of the team by emailing info@thetandt.com
other publications
Whether you’re looking to stay up-to-date with our latest news or read about how our game-changing non-destructive testing technology is helping our customers, we’re certain that our rapidly expanding digital publication library has something for you.
Issue #1
Theta Technology News
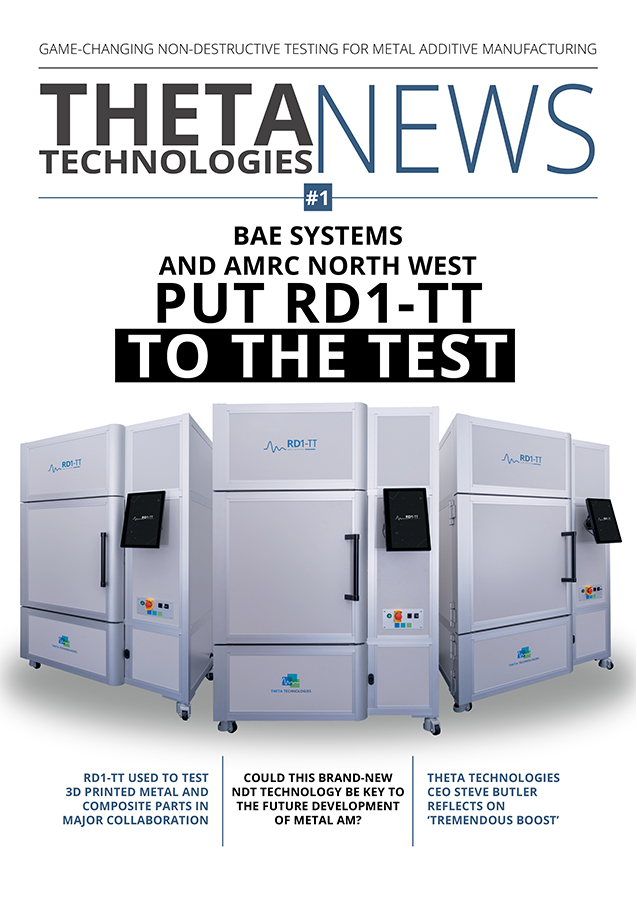
BAE Systems and AMRC North West put RD1-TT to the test in major collaboration
Issue #1
The Case Study
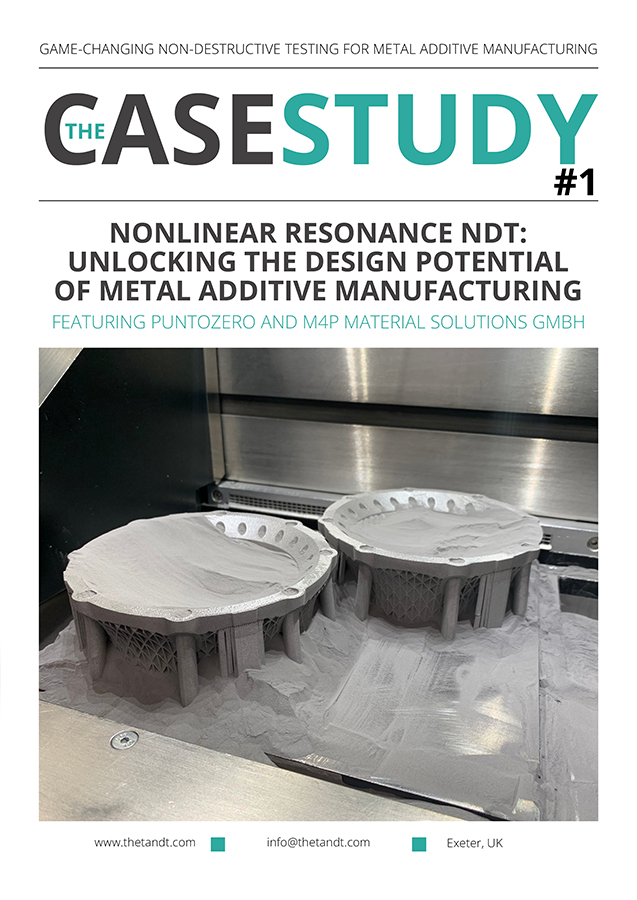
Nonlinear resonance NDT: Unlocking the design potential of metal AM. Featuring Puntozero and m4p material solutions GMBH
learn more
Find out more about this revolutionary NDT technology from the team that built it.
Address
Theta Technologies Limited
3 Babbage Way
Exeter Science Park
Clyst Honiton
Exeter
EX5 2FN
United Kingdom
Terms & Conditions Privacy & Cookie Policy Anti-Slavery Policy © Theta Technologies. 2026
