Additive Manufacturing:
The Inspection Challenges You Face and How to Solve Them With NDT.
Additive Manufacturing Part Inspection and NDT
Aerospace, Defence, Motorsport, Automotive, Oil and Gas, Medical, Power Generation, Renewables, Research Institutes.
Additive manufacturing (AM) has transformed manufacturing across industries with its ability to create intricate geometries efficiently. However, ensuring the quality of AM parts remains a challenge. AM presents unique challenges like volumetric cracks, lack of fusion, and porosity, requiring specialised inspection techniques. Addressing these challenges requires innovative NDT methods capable of detecting internal flaws, ensuring the integrity of AM components.
Exclusive
On-Demand
NDT Webinar
Explore the power of nonlinear resonance NDT for complex AM part qualification

Additive Manufacturing: The Future is here.
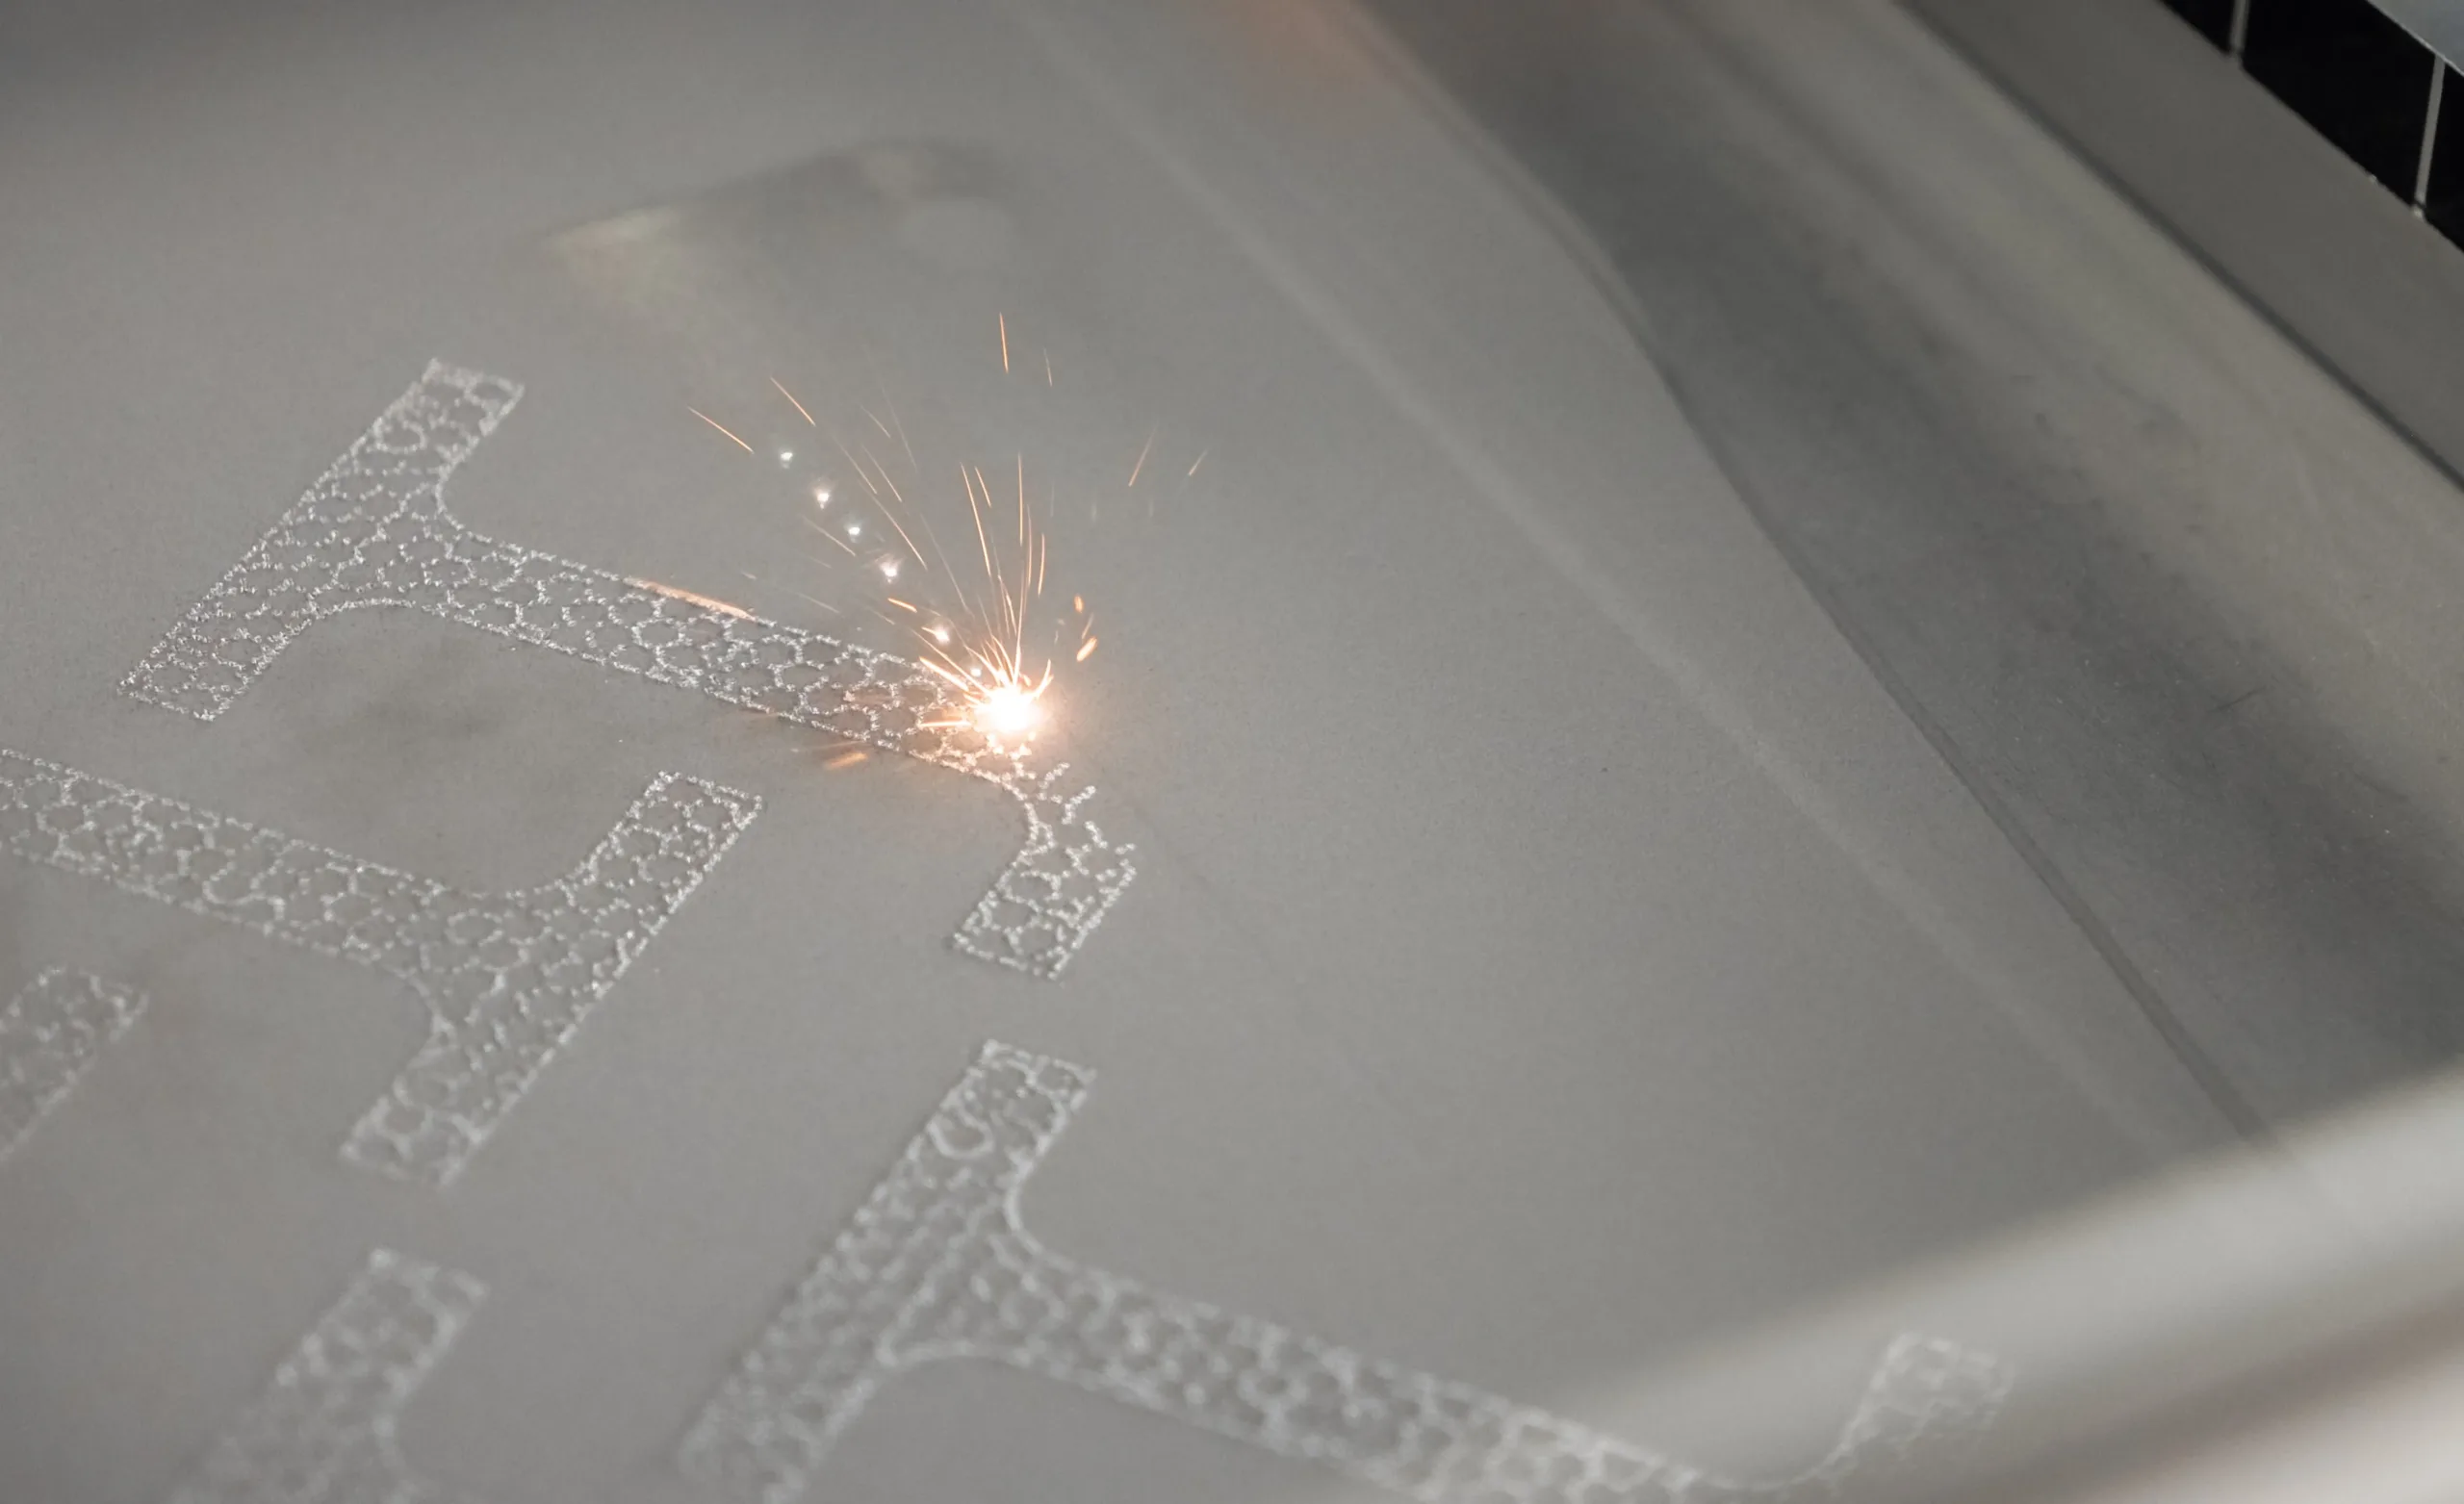
Additive manufacturing, often heralded as the future of manufacturing, has revolutionised the production landscape across various industries. Its ability to fabricate complex geometries with unmatched precision and efficiency has led to the ambitions for widespread adoption for applications in aerospace, automotive, oil and gas, defence, and a plethora of other sectors. But those ambitions are yet to be fully realised. As additive manufacturing continues to proliferate, engineers are faced with the daunting task of ensuring the quality and reliability of manufactured components. Central to this challenge is the need for effective part inspection methodologies that can accurately detect flaws and defects inherent in additive manufactured parts.
Traditionally, X-ray computed tomography (CT) scanning has been the go-to method for inspecting metal additive manufactured parts. However, despite its widespread use, X-ray CT scanning presents several significant challenges that impede its effectiveness in the additive manufacturing jurisdiction. Let us help you tackle the challenges facing AM part inspection and explore a novel alternative solution – nonlinear resonance non-destructive testing (NDT) – an exciting approach to overcoming the limitations of traditional inspection methods.
The importance of part inspection in additive manufacturing
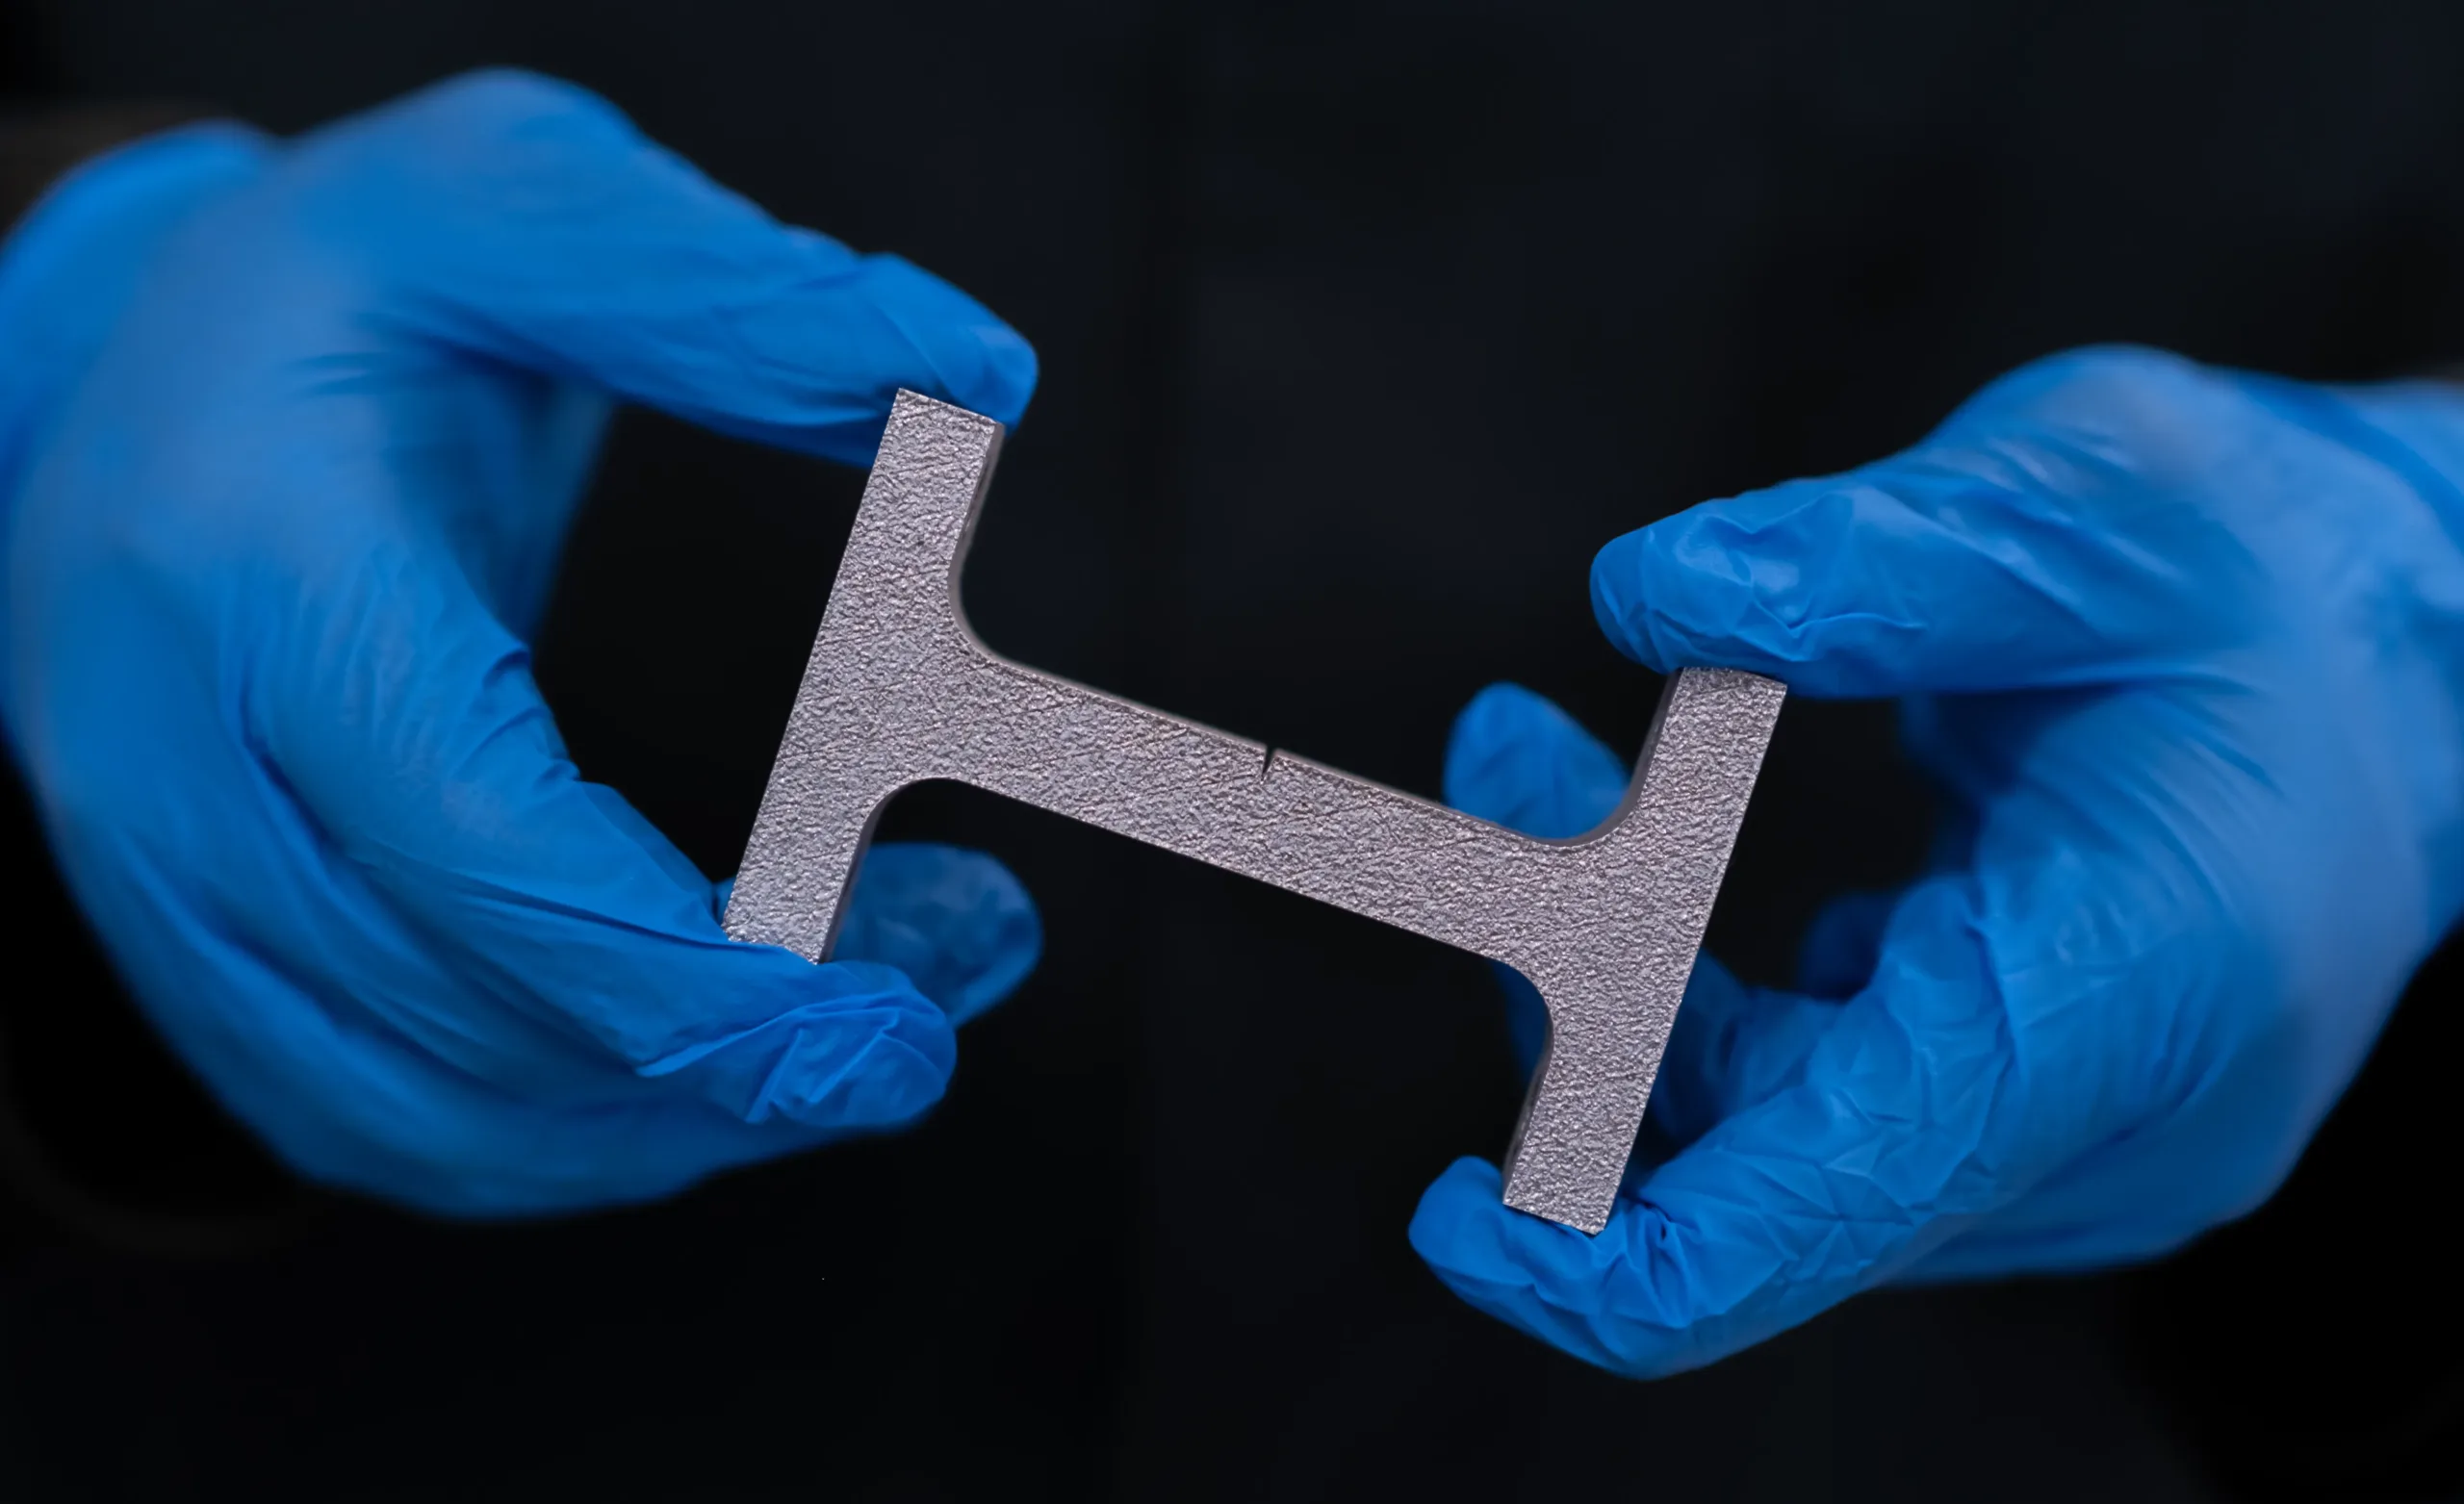
Part inspection plays a critical role in the additive manufacturing process, serving as a cornerstone of quality assurance and reliability. Unlike traditional manufacturing methods where defects are often visible on the surface, additive manufacturing introduces unique complexities that necessitate comprehensive inspection techniques capable of detecting internal flaws and defects. Inadequate part inspection practices can have significant implications for product performance, reliability, and safety, particularly in safety-critical industries.
Some have attempted to overcome the challenges presented by the uniqueness of the additive manufacturing technique by employing in process monitoring, whereby cameras take photographs as each layer is built. Although initially this seems like an obvious and simple method of detecting flaws in parts, it lacks the capability to detect flaws once the next layer is printed. This method leaves serious questions about the integrity of the finished part. Have the two layers fused fully? Has the melting of the next layer impacted the layer below? Have the cracks occurred after the build process?
Effective part inspection is essential for identifying and mitigating potential defects that can compromise the structural integrity and mechanical properties of additive manufactured components. By conducting thorough, and effective inspection practices, manufacturers can identify a range of potentially detrimental flaws early in the production process, allowing for timely interventions and corrective actions to prevent costly rework or component failure down the line.
Moreover, part inspection serves as a critical quality control measure to ensure compliance with industry standards and regulations. Safety-critical industries have stringent requirements for component reliability and performance, making thorough inspection processes indispensable. By adhering to rigorous inspection protocols and leveraging advanced inspection technologies, manufacturers can demonstrate the integrity and quality of their additive-manufactured components, instilling confidence in end-users and regulatory bodies alike. Ultimately, effective part inspection is not just about meeting quality standards; it is about safeguarding the reliability, safety, and reputation of additive-manufactured products in an increasingly competitive and demanding marketplace.
Unique part inspection challenges in additive manufacturing.
Additive manufacturing presents a unique set of inspection challenges that are distinct from those encountered in traditional manufacturing processes. The complexity and variability of additive manufactured parts, combined with the inherent properties of additive manufacturing techniques, contribute to the emergence of novel flaws and defects that require specialised inspection methods for detection and characterisation.
Volumetric cracks, lack of fusion, voids, porosity, and trapped powder are among the most common defects encountered in additive manufactured parts. These defects are known to compromise the structural integrity and mechanical properties of components, posing significant risks to product performance and reliability. Cracks, in particular, can occur both during and after the build process, making them a real problem for Additive manufacturing. Post-processing steps still tend to involve the use of potentially damaging tools such as angle grinders, cutting wheels, and heat treatments meaning the opportunity for cracks developing within the printed part at this later stage are still present, even if the build itself is deemed successful. Additionally, factors such as surface finish, internal mesh conditions, part and material density, print-bed performance, and post-processing optimisation further compound the inspection challenges faced by engineers in additive manufacturing.
Unlike traditional manufacturing processes where defects are primarily surface-based and easily detectable, additive manufacturing introduces inherent complexities that necessitate comprehensive volumetric inspection techniques. The intricate internal structures and layer-by-layer fabrication process of additive manufacturing make it essential to employ advanced NDT methods capable of penetrating through the entire volume of a component to detect hidden flaws and defects.
The solution: Nonlinear resonance NDT
Theta Technologies’ Nonlinear resonance non-destructive testing (NDT) has emerged as the solution to resolve the challenges faced by engineers in additive manufacturing part inspection. Unlike traditional inspection methods like X-ray CT scanning (until now, the only truly viable method for AM part inspection), nonlinear resonance NDT offers a truly rapid, cost-effective, and highly sensitive approach to detecting flaws and defects in increasingly complex additive manufactured parts, even with the inherent surface roughness attributed to the 3D printing process.
At its core, nonlinear resonance NDT leverages the principles of nonlinear acoustic testing to excite an additive manufactured component into resonance and observe microscopic flaw behaviours under test conditions. This technique offers unparalleled sensitivity to even the smallest flaws, with detection capabilities reaching down to under 10 microns. By analysing the nonlinear response of the component to excitation, engineers can identify and characterise a wide range of defects, including volumetric cracks, lack of fusion, voids, and porosity.
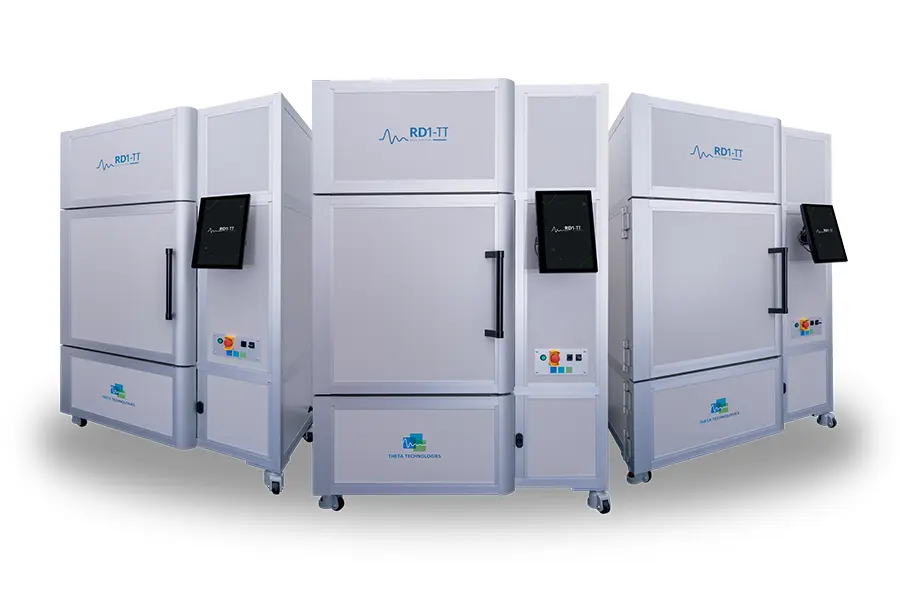
Packaged as an in-house inspection solution known as RD1-TT, the technology boasts rapid testing capabilities, with tests typically completed in under a minute per component. This is perfect for immediate pass/fail triage at any stage of your manufacturing process, but particularly shines when deployed immediately after printing and prior to post-processing. This efficiency not only accelerates the inspection process but also minimises production downtime and enhances overall manufacturing throughput.
How does nonlinear resonance NDT work?
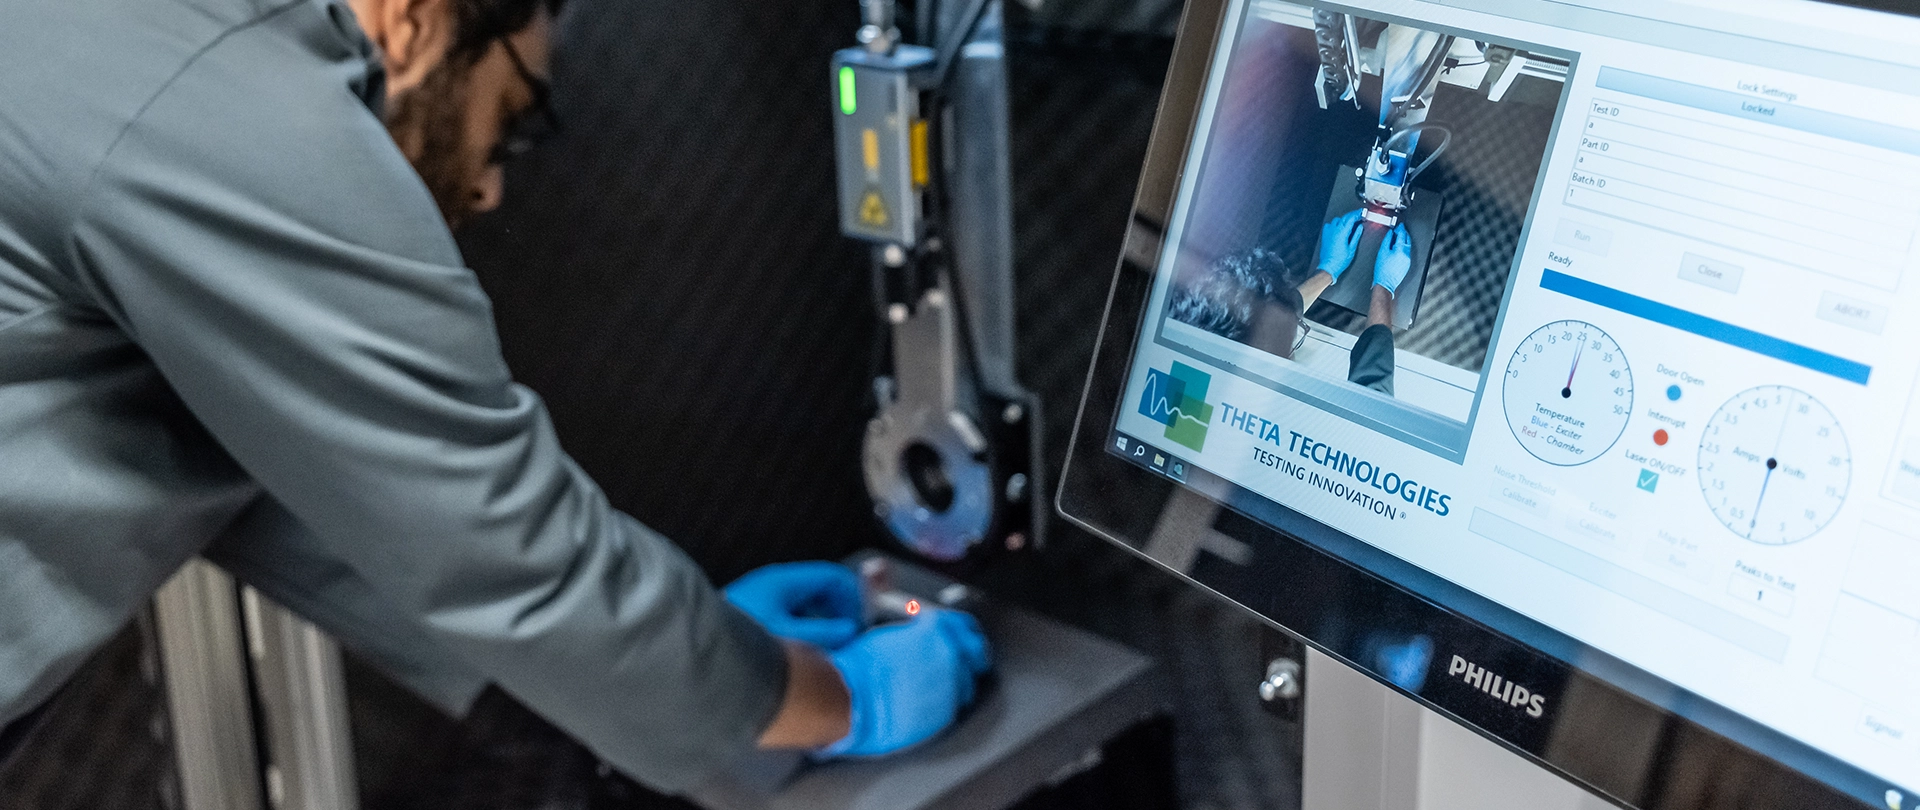
This all sounds amazing, but how does the system work practically? The RD1-TT has simplified the process significantly meaning the process can be summarised as:
- Position the part to be tested in the enclosure.
- Excite the sample into resonance.
- Measure the part’s unique signature and wait for the algorithm to capture changes in the response as the excitation amplitude varies. If the part is flaw-free, the response shouldn’t change except to scale with the excitation amplitude. If the part is flawed, other features will appear in the response, be captured by the algorithm, and reported.
- RD1-TT reports back a pass/ fail result in less than a minute.
Use cases and applications for nonlinear resonance NDT
Introducing a new technology into critical industries necessitates thorough validation and demonstration of its efficacy. This ground-breaking advancement in non-destructive testing has undergone rigorous testing and validation across various applications, and materials to showcase its unparalleled capabilities.
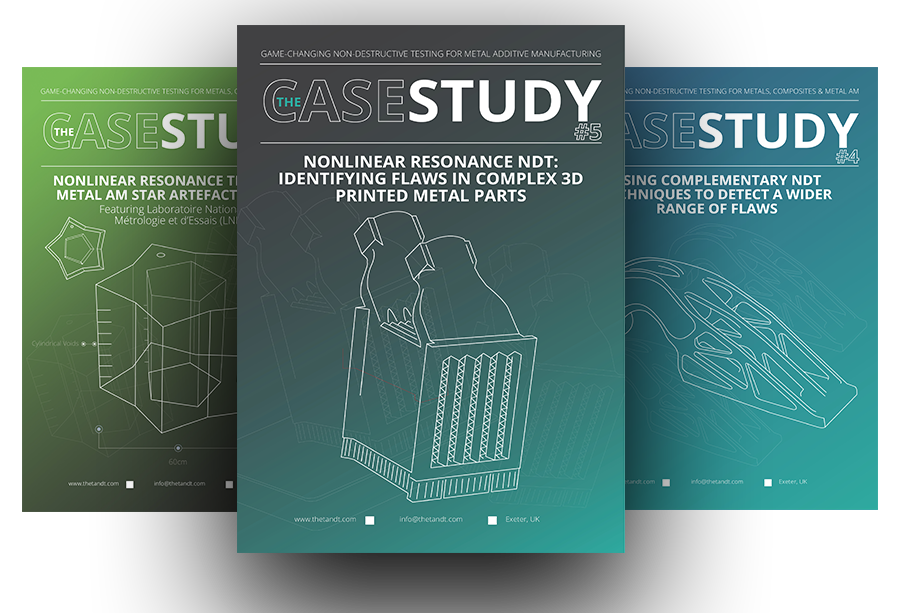
Discover the applications by
exploring our case study library.
From automotive heat exchangers to aerospace hinge brackets, see how nonlinear resonance NDT performs when put to the test for a range of additive manufactured components.
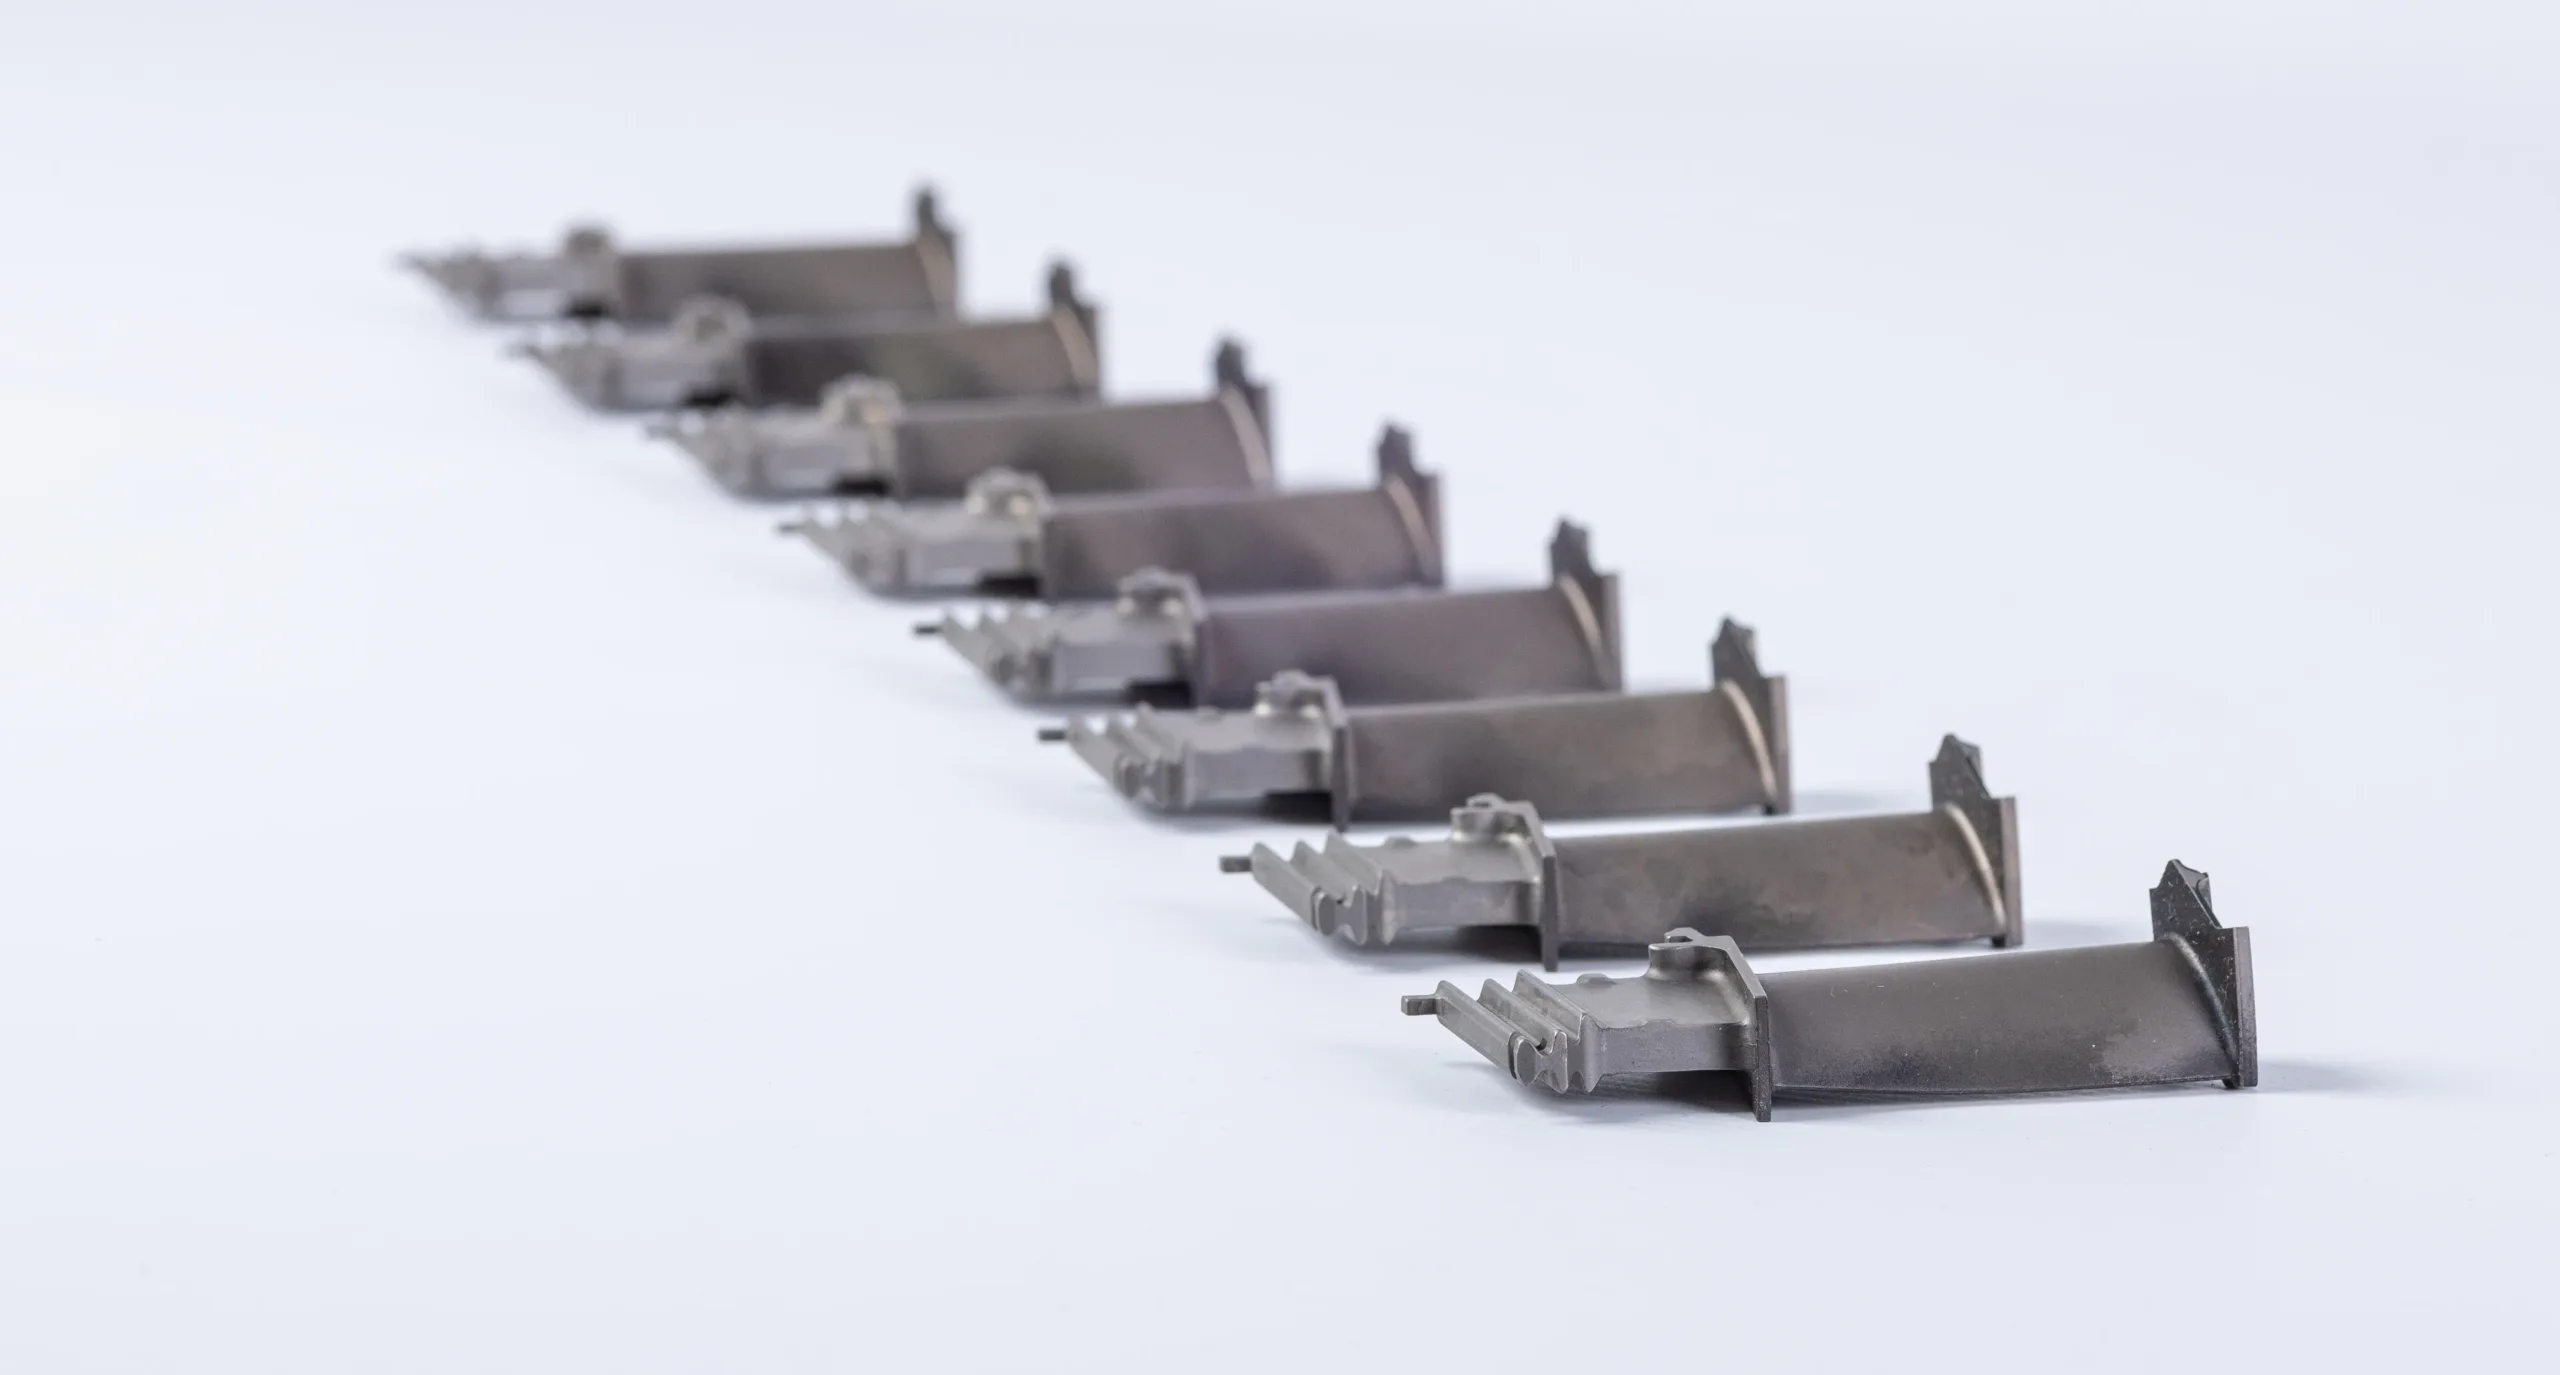
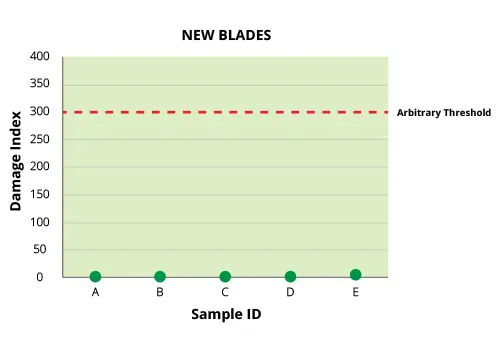
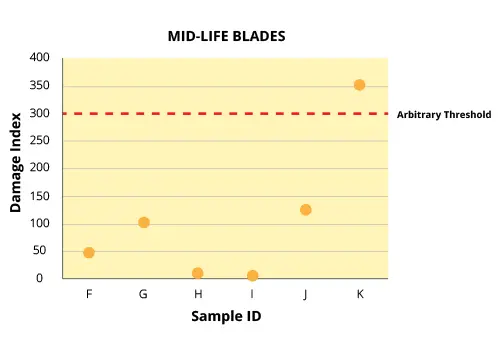
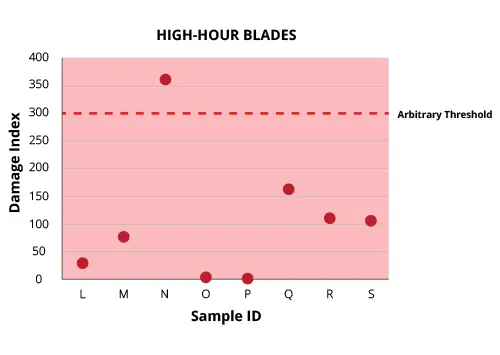
One notable application was its deployment in assessing creep in nickel superalloy turbine blades for power generation. Traditionally, turbine blades are replaced based on predetermined intervals, leading to potential waste of resources and costs if replaced prematurely.
By employing nonlinear resonance NDT during routine maintenance, comprehensive data was gathered to accurately assess the condition of turbine blades during their lifespan. The results revealed that some high-hour use blades, upwards of 50,000 hours in an intense, hot environment, remained suitable for continued operation, while some low or mid-hour use blades exhibited signs of creep and subsequently required replacement. This demonstrated the profound safety and cost-saving benefits of nonlinear resonance NDT in optimising maintenance practices.
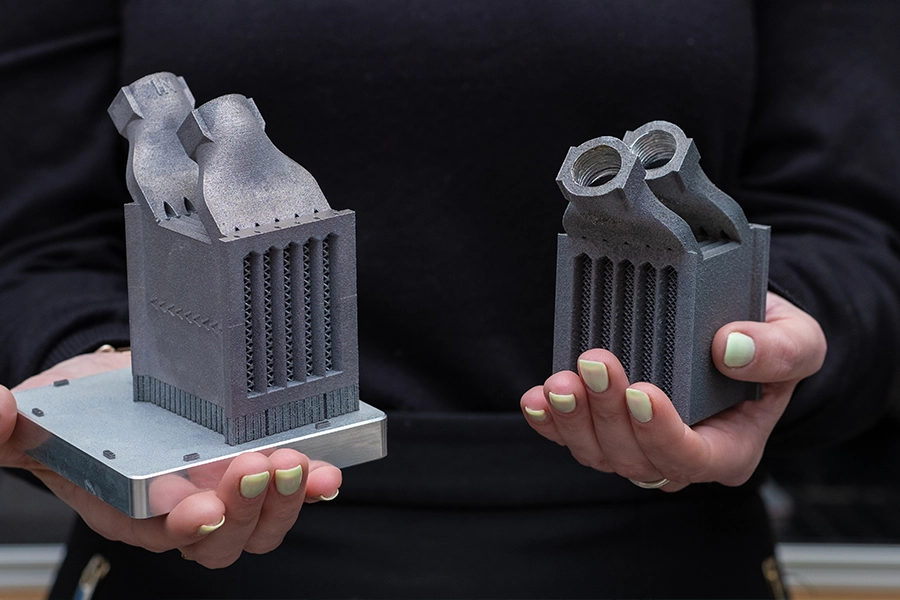
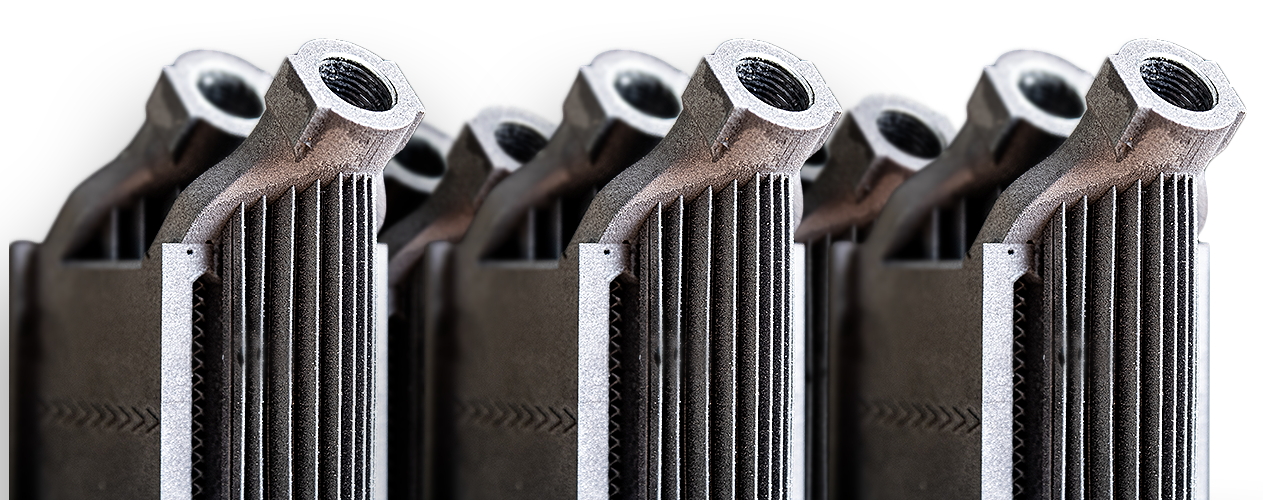
Nonlinear resonance NDT has also proved invaluable in inspecting additive-manufactured aluminium and Inconel heat exchangers, known for their intricate geometries and characteristics challenging for traditional NDT methods like X-ray CT scanning. With the ability to detect flaws even within complex components and perform tests directly on the build plate post-printing, nonlinear resonance NDT showcased its adaptability and effectiveness in ensuring the quality and integrity of critical components. Additionally, in a comparative case study against traditional destructive methods like tensile stress testing, nonlinear resonance NDT accurately predicted the likelihood of part failure under stress, highlighting its superiority in evaluating actual parts intended for use. This underscored the inefficiency and wasteful nature of such destructive methods, emphasising the indispensable role of nonlinear resonance NDT in revolutionising part inspection processes.
So, what’s the catch? Nonlinear Resonance isn’t without its limitations and isn’t designed to be a one stop solution given the wide variety of potential for AM failure mechanisms. As a whole-body resonance technique, RD1-TT is not currently able to detect void-like defects in the nonlinear metrics as they behave as features of the parts. Holes and porosity would however, present themselves in the linear resonance metrics, obtained as an additional benefit of the test for nonlinearity.
Conclusion
Additive manufacturing presents unique challenges in part inspection that require increasingly innovative solutions to overcome. While traditional inspection methods like x-ray CT scanning have been instrumental in quality control efforts, they are not without limitations. Theta Technologies’ nonlinear resonance NDT offers a compelling alternative that addresses the shortcomings of traditional inspection methods, providing rapid, sensitive, and cost-effective testing capabilities for additive manufactured parts.
By leveraging advanced NDT technologies like nonlinear resonance NDT, engineers can enhance the quality assurance process, minimise production risks, and unlock the full potential of additive manufacturing in safety-critical applications. As additive manufacturing continues to evolve, the importance of effective part inspection cannot be overstated. It is imperative for manufacturers to embrace innovative inspection techniques and uphold stringent quality standards to ensure the reliability and integrity of additive manufactured components in an increasingly demanding manufacturing landscape.
As the focus on additive manufacturing continues to move from prototyping and exploring the possibilities of the technology in an academic setting to a commercially focussed, demanding production focus, nonlinear resonance has the potential to deliver inspection of complex production parts at scale without impacting lead times.
BOOK A FREE
NON-DESTRUCTIVE PART TEST
Discover how effective our nonlinear resonance NDT solution is with a complementary part test.

Talk to
Our Team of
Technical Specialists
Connect with our team of technical experts today and explore how RD1-TT can help revolutionise your additive manufacturing processes.
Address
Theta Technologies Limited
3 Babbage Way
Exeter Science Park
Clyst Honiton
Exeter
EX5 2FN
United Kingdom
Terms & Conditions Privacy & Cookie Policy Anti-Slavery Policy © Theta Technologies. 2026
